---
title: "Build Custom Gutenberg Blocks Using ACF Blocks (No React Required)"
url: https://wpvibes.com/blog/custom-gutenberg-acf-blocks/
date: 2026-08-31
modified: 2026-08-31
author: "Rashi"
description: "Learn how ACF Blocks let you build custom Gutenberg blocks using the same PHP and get_field() calls you already use, with no React or JavaScript build pipeline required. This guide walks through three real blocks: Testimonial, Feature CTA, and Team Members."
categories:
- "Tutorials"
tags:
- "ACF"
- "ACF Blocks"
- "Custom Blocks"
- "Gutenberg"
- "WordPress"
image: https://wpvibes.com/wp-content/uploads/2026/08/custom-acf-blocks-1024x538.png
word_count: 3089
---
# Build Custom Gutenberg Blocks Using ACF Blocks (No React Required)
For years, building custom Gutenberg blocks meant learning React, setting up a build pipeline, and wrestling with JavaScript tooling most PHP developers never signed up for. ACF Blocks changes that. If you already know PHP and use Advanced Custom Fields on your projects, you can build production-ready custom Gutenberg blocks today - with the same familiar `get_field()` calls, no React, no npm, no build step.
This guide walks through building a real plugin with **three custom Gutenberg blocks** using ACF Blocks, progressing from simple to advanced.
## What You'll Build
Three production-ready blocks packaged as a single plugin (`wpvibes-acf-blocks`):
- **Testimonial Block**: a customer quote with author name, title, and photo
- **Feature CTA Block**: a feature card with image, heading, description, and button link
- **Team Members Block**: a responsive grid of team members using ACF's Repeater field, with configurable column count
Each block lives in its own folder inside the plugin. Adding a new block later means creating one new folder - no changes to any existing file.
## Prerequisites
- **WordPress 6.7 or later** (any version supporting ACF Blocks V3)
- **[ACF Pro](https://wpbuilderaddons.com/tutorial/acf-vs-pods/)**: required for building custom blocks. The free version of ACF does not support this. ACF Pro is $49/year for a single site.
- **Local development environment** (LocalWP, WordPress Studio, wp-env, or similar)
- **Any WordPress theme**: block themes (Twenty Twenty-Four) or classic themes both work. No child theme required since we're using a plugin.
- **Basic PHP knowledge**: you'll write PHP templates using standard ACF functions
## Step 1: Set Up the Plugin
The plugin contains all three blocks in one folder structure, organized so adding new blocks later is trivial.
### 1.1 - File structure
Create this folder inside `wp-content/plugins/`:
wpvibes-acf-blocks/
├── wpvibes-acf-blocks.php
└── blocks/
├── testimonial/
│ ├── block.json
│ ├── render.php
│ └── style.css
├── feature-cta/
│ ├── block.json
│ ├── render.php
│ └── style.css
└── team-members/
├── block.json
├── render.php
└── style.css
**Why this structure?**
- **One block = one folder** - every block owns its `block.json`, `render.php`, and `style.css` in the same place. Delete the folder and the block is gone.
- **Auto-registration** - the main plugin file scans `blocks/` and registers every folder it finds. Adding a new block never requires touching this file.
- **Per-block CSS** - each block's styles are in its own file, loaded automatically when the block appears on a page.
This is the same pattern used in our [PHP-only blocks guide](https://wpvibes.com/blog/php-only-blocks-wordpress/) - one block, one folder, self-contained.
### 1.2 - The main plugin file
Create `wpvibes-acf-blocks.php`:
**Key points:**
- **`get_field()`** - ACF's standard function for retrieving field values. Works exactly the same in ACF Blocks as it does anywhere else in ACF.
- **`$block['className']`** - WordPress passes any classes the user added via the sidebar's Advanced section.
- **`$block['align']`** - the alignment the user picked (wide, full).
- **`$block['anchor']`** - the HTML ID the user set.
- **Every field wrapped in `if ( $field )`** - optional fields don't render empty tags.
- **`esc_html()` and `esc_url()`** - always escape output. Standard WordPress security.
**The `$author_image` array structure** (when Return Format is "Image Array"):
- `$author_image['url']` - full-size URL
- `$author_image['sizes']['thumbnail']` - thumbnail URL
- `$author_image['sizes']['medium']` - medium URL
- `$author_image['alt']` - alt text
### 2.4 - Create style.css
Create `blocks/testimonial/style.css`:
.wpvibes-testimonial {
background: #f9fafb;
padding: 32px;
border-radius: 12px;
max-width: 640px;
margin: 1.5em auto;
}
.wpvibes-testimonial__quote {
font-size: 18px;
line-height: 1.6;
color: #1f2937;
font-style: italic;
margin: 0 0 24px;
border: none;
}
.wpvibes-testimonial__author {
display: flex;
align-items: center;
gap: 12px;
}
.wpvibes-testimonial__image {
width: 60px;
height: 60px;
border-radius: 50%;
object-fit: cover;
}
.wpvibes-testimonial__name {
margin: 0;
font-weight: 600;
color: #111827;
}
.wpvibes-testimonial__title {
margin: 0;
font-size: 14px;
color: #6b7280;
}
### 2.5 - See it working
- Create a new page: **Pages → Add New**
- Click **+** in the block inserter and search for **Testimonial**
- Insert the block
- Fill in the fields on the right sidebar:
Testimonial Text: `"WPVibes plugins saved us weeks of development time. The support is fantastic."`
- Author Name: `Sarah Chen`
- Author Title: `Lead Developer, TechCorp`
- Author Image: upload a headshot
- Watch the preview update in real time
- Preview the frontend
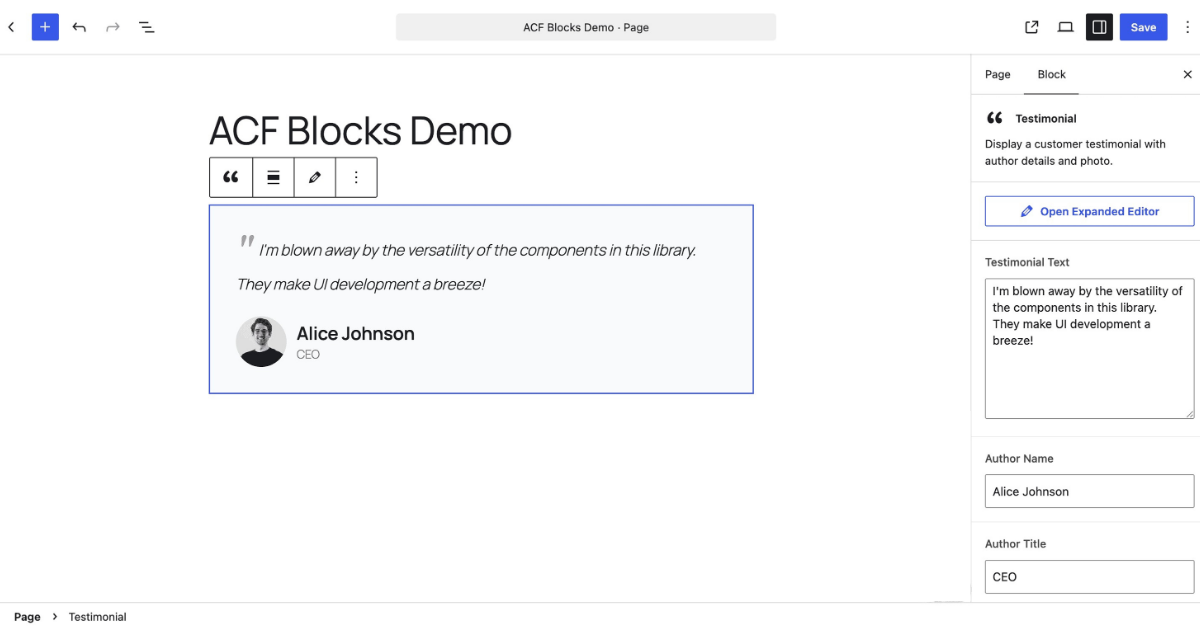Testimonial field group with all 4 fields and location rule visible
Your first ACF block is done - no React, no build step, just PHP and CSS you already know.
## Step 3: Build the Feature CTA Block
The Feature CTA block introduces two new patterns - the **Link field** (URL + label + target in one field) and using images at different sizes. Same block structure as Testimonial, just different fields.
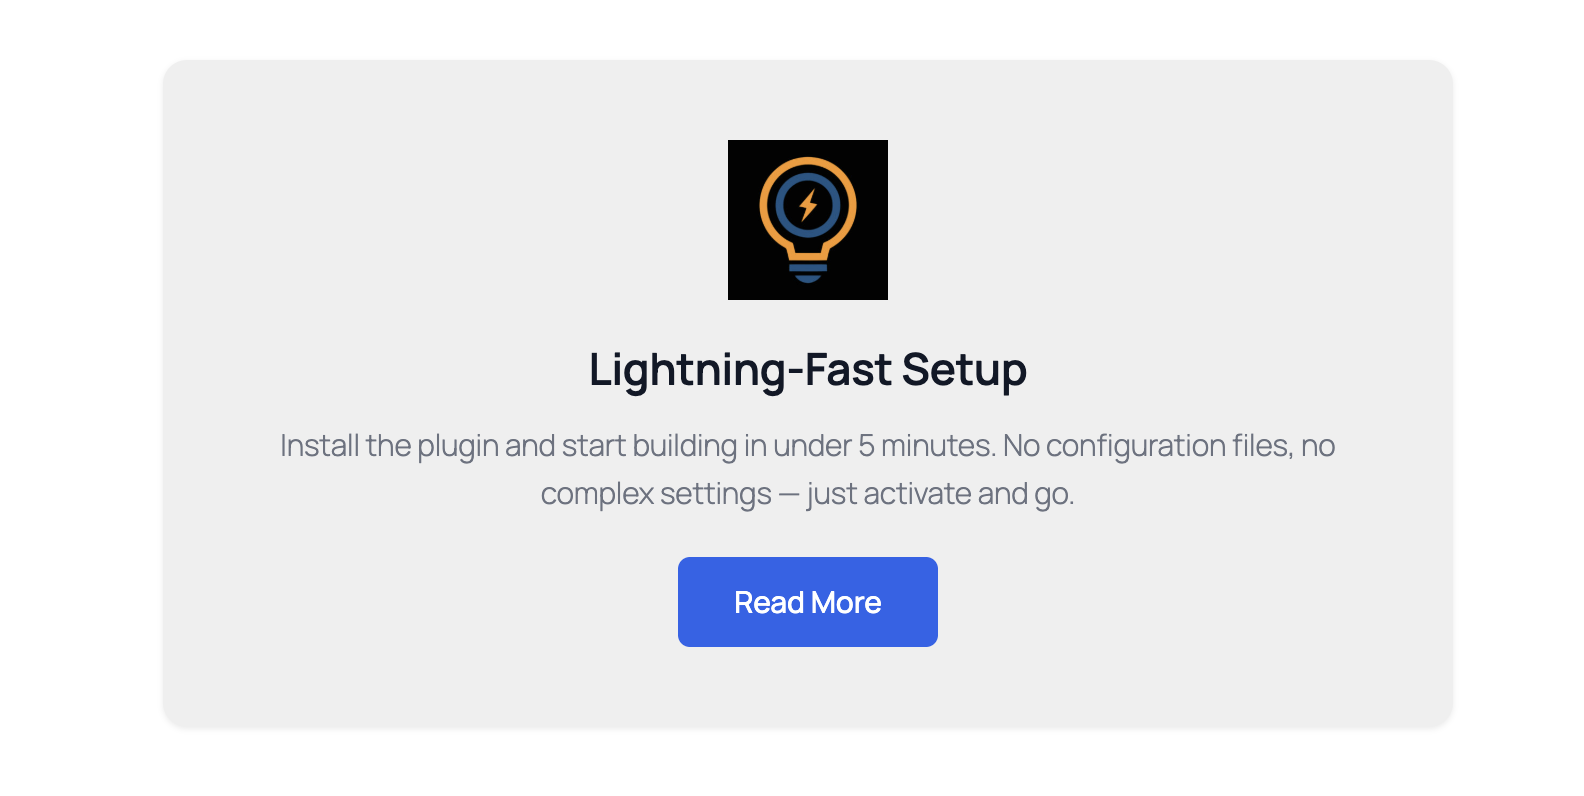Feature CTA block rendered on the frontend
### 3.1 - Create block.json
Create `blocks/feature-cta/block.json`:
{
"$schema": "https://schemas.wp.org/trunk/block.json",
"apiVersion": 3,
"name": "wpvibes/feature-cta",
"title": "Feature CTA",
"description": "A feature card with image, heading, description, and call-to-action button.",
"category": "design",
"icon": "megaphone",
"keywords": ["feature", "cta", "call to action", "card"],
"supports": {
"align": ["wide", "full"],
"anchor": true,
"jsx": true
},
"acf": {
"mode": "preview",
"renderTemplate": "render.php"
},
"style": "file:./style.css"
}
### 3.2 - Create the ACF Field Group
Create a new field group called **Feature CTA Block Fields** with these four fields:
| Field Label | Field Name | Field Type | Notes |
| ----------- | ---------- | ---------- | ----- |
| Feature Image | feature_image | Image | Return Format: **Image Array** |
| Heading | heading | Text | Required |
| Description | description | Textarea | Rows: 3 |
| Button Link | button_link | Link | Return Format: **Link Array** |
**Set the location rule:** Show this field group** if → Block → is equal to → Feature CTA.**
### 3.3 - Create render.php
Create `blocks/feature-cta/render.php`:
The full render template, with every sub-field's markup included, is here: [blocks/team-members/render.php](https://github.com/webtechhardik/wpvibes-acf-blocks/blob/main/blocks/team-members/render.php).
**Three ACF Pro functions doing the heavy lifting:**
- **`have_rows( 'team_members' )`** - checks if the repeater has any rows. Similar in shape to WordPress's `have_posts()`.
- **`the_row()`** - loads the current row's data so `get_sub_field()` calls work.
- **`get_sub_field( 'field_name' )`** - retrieves a sub-field value from the current row.
Once you understand this three-function loop, you can build any repeater-based block - image galleries, feature lists, pricing tiers, timelines, FAQ accordions. The pattern is always the same.
### 4.4 - Create style.css
Create `blocks/team-members/style.css`:
.wpvibes-team {
margin: 2em auto;
}
.wpvibes-team__grid {
display: grid;
gap: 32px;
}
.wpvibes-team--cols-2 .wpvibes-team__grid { grid-template-columns: repeat(2, 1fr); }
.wpvibes-team--cols-3 .wpvibes-team__grid { grid-template-columns: repeat(3, 1fr); }
.wpvibes-team--cols-4 .wpvibes-team__grid { grid-template-columns: repeat(4, 1fr); }
.wpvibes-team__member {
display: flex;
flex-direction: column;
align-items: center;
text-align: center;
padding: 32px 24px;
background: #ffffff;
border-radius: 12px;
box-shadow: 0 1px 3px rgba(0, 0, 0, 0.08);
}
### 4.5 - See it working
- Insert **Team Members** from the Design category
- Set section heading: "Meet Our Team"
- Set columns to 3
- Click **Add Team Member** - add several members with photo, name, role, and bio
- Watch the grid render in the editor preview
- Try changing columns to 2 or 4 to see the layout adapt
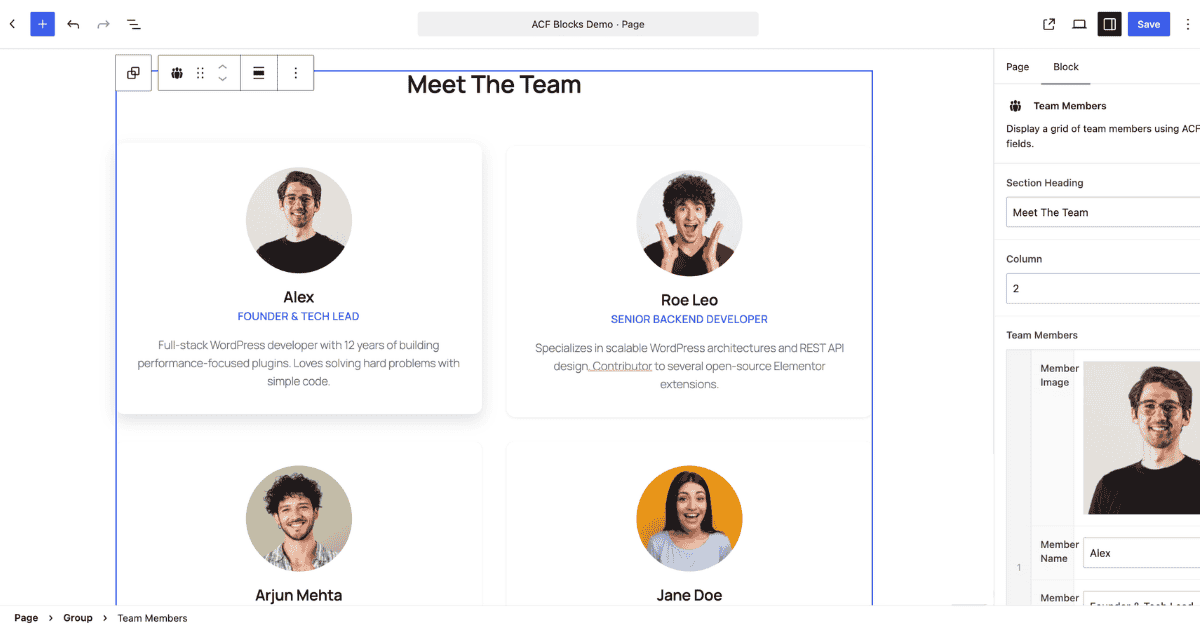Team Members block in the editor with 4 members and column selector visible
Three real, production-ready blocks in one plugin - done.
## Get the Full Plugin
The complete plugin - with all three blocks, full CSS, and README - is on **[GitHub](https://github.com/webtechhardik/wpvibes-acf-blocks)**:
To install:
cd wp-content/plugins/
git clone https://github.com/webtechhardik/wpvibes-acf-blocks.git
Then activate from **Plugins → Installed Plugins**. Adding a new block:
- Create a new folder inside `blocks/` (e.g., `blocks/pricing-table/`)
- Add `block.json`, `render.php`, and `style.css` to it
- Create the matching ACF field group with location rule `Block = Pricing Table`
That's it. No changes to `wpvibes-acf-blocks.php`, no manual registration - the loader handles everything.
## Why ACF Blocks Makes Block Development Easy
Building custom Gutenberg blocks the "official" way means learning React, setting up a JavaScript build pipeline (Webpack, Babel, Node.js), and mastering the block editor's JavaScript APIs. That's a real learning curve - several weeks of investment before shipping the first block.
ACF Blocks removes almost all of that. If you already know PHP and use ACF on your projects, the entire mental shift is small:
- **You write PHP templates** - the same syntax you've been writing for years
- **You use `get_field()`** - the same function you already use everywhere else
- **ACF handles the editor experience** - field UI, live preview, validation, all automatic
- **No build step** - save PHP, refresh the browser
The tradeoff is that ACF Pro costs $49/year for a single site. For agencies and freelancers building client sites, that's a rounding error compared to the time saved on every project.
For blocks that need advanced editor experiences (drag-and-drop, deep interactivity, custom media handling), React blocks still make sense. But for the vast majority of custom blocks a WordPress site actually needs - testimonials, feature cards, team grids, pricing tables, hero sections - ACF Blocks does the job faster with less friction.
## Frequently Asked Questions
### Do I need ACF Pro, or does the free version work?
ACF Pro is required. Custom block registration is a Pro-only feature. The free ACF plugin supports custom fields on posts and pages, but not custom Gutenberg blocks. ACF Pro is $49/year for a single site.
### Can I use ACF Blocks in a child theme instead of a plugin?
Yes. The [official ACF tutorial](https://www.advancedcustomfields.com/resources/create-your-first-acf-block/) uses this approach. The plugin approach shown in this guide is better for portability - the blocks work regardless of which theme is active.
### Why does get_field() return null in my ACF Block?
The most common cause is the field group's location rule. It must be set exactly to **Block = [Block Name]**. If the rule says "Post Type" or anything else, the fields don't attach to the block. This trips up nearly every developer at least once.
### Can ACF Blocks use InnerBlocks (nested blocks)?
Yes. Add `` to your `render.php` template. ACF officially supports this in ACF Blocks V3. This gives you container blocks where users can nest core blocks inside.
### How do I add a custom icon instead of a Dashicon?
Two ways. Use any Dashicon slug in `block.json`'s `icon` field (like `format-quote` or `groups`). Or, with WordPress 7.1+, register your own SVG icon and reference it. See our [Custom SVG Icons guide](https://wpvibes.com/blog/wordpress-custom-icons/) for the full process.
### What's the difference between ACF Blocks and PHP-only blocks (WordPress 7.0+)?
ACF Blocks require ACF Pro but support 30+ field types (repeater, image, gallery, relationship, etc.). WordPress 7.0's [PHP-only blocks](https://wpvibes.com/blog/php-only-blocks-wordpress/) are free but limited to 4 attribute types (string, integer, boolean, enum). For simple blocks, PHP-only works. For anything with images, repeaters, or complex data, ACF Blocks wins.
### How do I loop through a repeater on the frontend?
Use the standard ACF repeater loop: `have_rows()`, `the_row()`, and `get_sub_field()`. This pattern works exactly the same in an ACF Block as it does anywhere else in ACF. The Team Members block in this guide is a full working example.
### Can I ship an ACF field group in the plugin so users don't have to create it manually?
Yes, using ACF's **JSON sync** feature. Create an `acf-json/` folder in the plugin root. When users save a field group, ACF writes it to that folder. Include those JSON files in the plugin zip. When a user activates the plugin, ACF loads the field group automatically. This is the approach ACF's [official documentation](https://www.advancedcustomfields.com/resources/synchronized-json/) recommends for shipping fields with plugins or themes.
## Wrapping Up
Custom Gutenberg blocks don't require learning React. If you know PHP and use ACF on your projects, you can start shipping real blocks today - with the same familiar workflow you already use for everything else.
The takeaways:
- **The pattern is consistent** - every ACF block is `block.json` + field group + `render.php` + `style.css` in one folder
- **The location rule is critical** - always set the field group to `Block = [Block Name]`, or `get_field()` returns null
- **One block = one folder** - self-contained, easy to add, easy to remove
- **Auto-registration scales** - the plugin scans `blocks/` and registers every folder, so adding a new block requires zero changes to existing files
- **The Repeater field is the payoff** - three functions (`have_rows`, `the_row`, `get_sub_field`) unlock unlimited grid layouts, team lists, pricing tiers, and more