
WooCommerce product page is the one that visitors see before deciding to buy a product. It’s a place to list all information about a product and make it look attractive so that people can buy your product without any doubts. Now, usually, these pages look nice and work fine, but sometimes you want them to stand out more, especially for unique products.
By default, WooCommerce gives you options to change how these pages look by using template files. These files basically control the layout of your product pages. But most of these templates apply to all your product pages. So, if you want something different for just one product page, it’s a bit tricky.
In this tutorial, I’ll show you how to create a template and apply it to only one product page, and we’ll also explain how to use this custom template across all product pages.
Key Takeaways
- Learn how to create a custom WooCommerce product page using [ae_plugin_name].
- Explore the power of Dynific Addons Templates to design product pages that stand out.
- Discover how to apply a custom template to all product pages or just a specific one.
- Find out which widgets (Title, Price, Image, Add to Cart, etc.) to use for building a complete product layout.
- Read how to preview and publish your template to make it live for your store.
Why Should You Customize WooCommerce Product Pages?
- Stand Out From Competitors: A custom-designed page makes your products shine and creates a better first impression.
- Improve SEO Performance: Optimized product layouts can improve keyword relevance, reduce bounce rates, and increase search rankings.
- Boost Conversions: Clear CTAs, product reviews, and better layouts help guide customers toward completing their purchase. You can even enhance trust further by adding videos to your WooCommerce product gallery, which allows shoppers to see the product in action.
- Increase Flexibility: With tools like AnyWhere Elementor Pro, you can apply unique designs to specific products or apply templates globally across your store.
What are the Requirements to Customize the WooCommerce Product Page?
To customize the WooCommerce Product Page, you’ll need to meet these prerequisite requirements.
- A working WordPress website
- WooCommerce plugin
- Elementor installed
- Dynific Addons for Elementor plugin to create custom templates
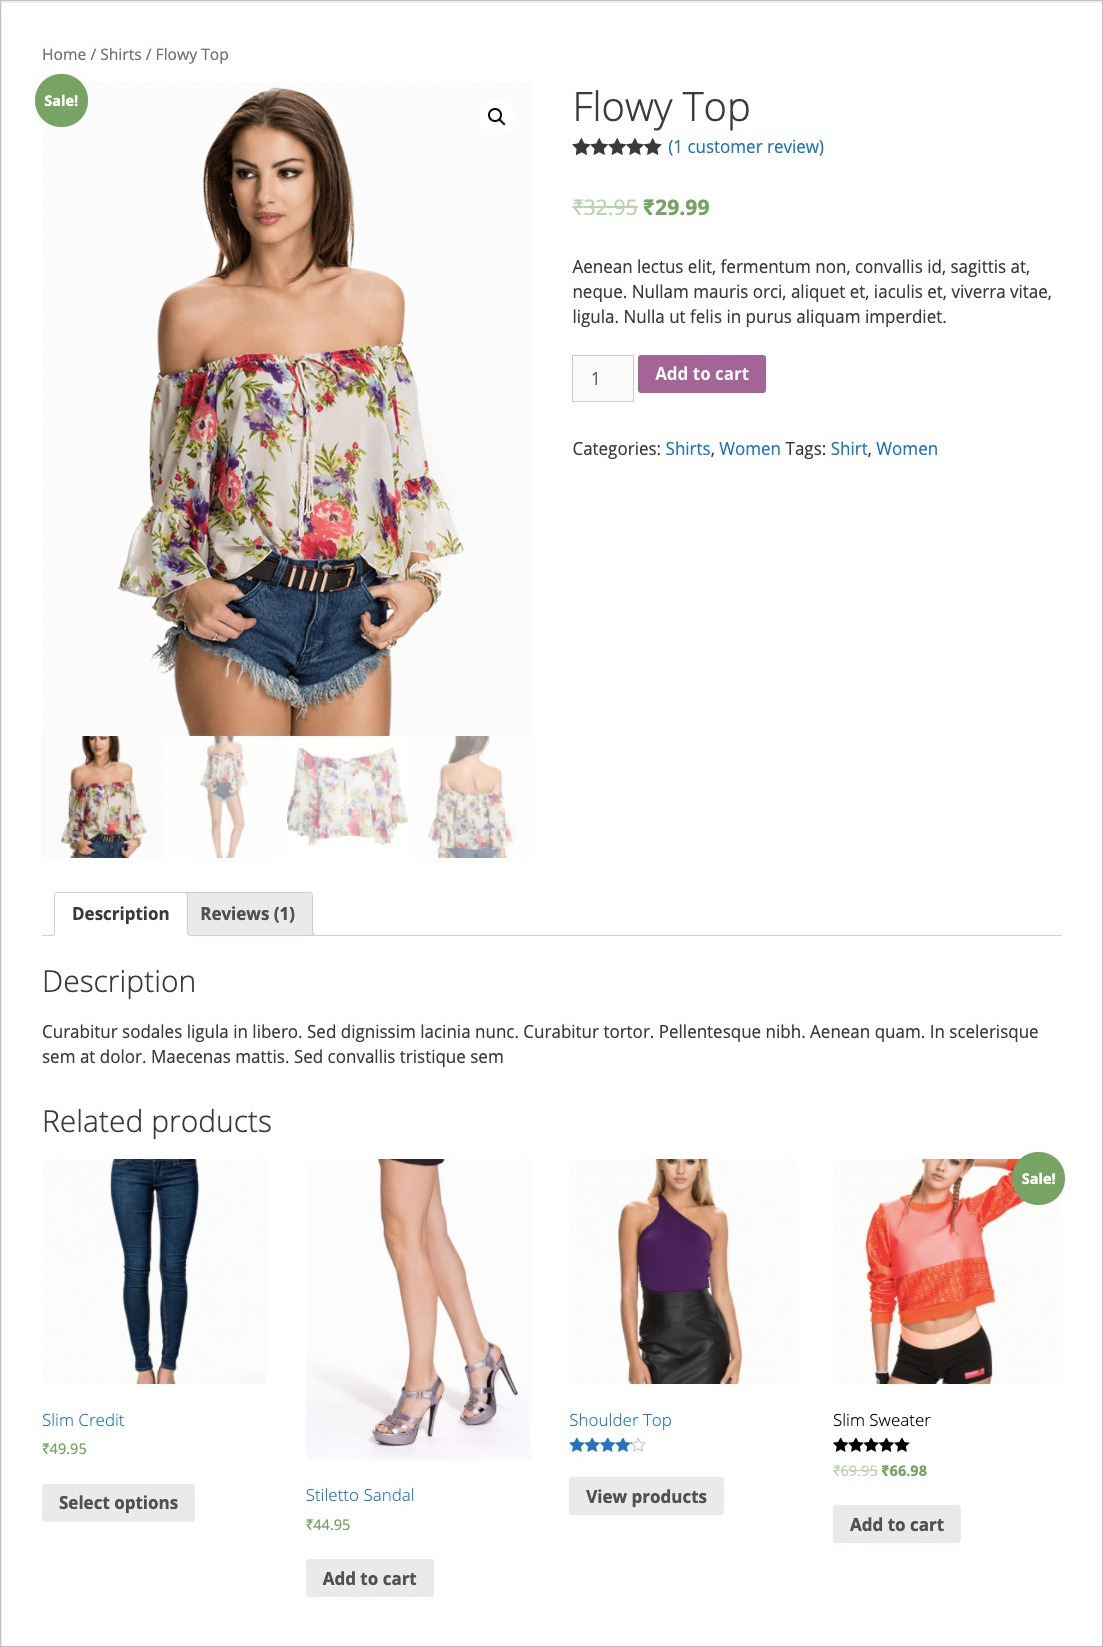
Here is the overview of how our product page will look on the frontend.
How To Create a Single Product Page Template
Creating a New Post Template
Navigate to your WordPress admin dashboard, click on the Dynific Addons Template -> Add New, give your template a name, and do the following configurations under the AnyWhere Elementor Settings.
- In Render Mode, select Post Template, as we are creating a template for a single post.
- Next, select Products in Post Type.
- In the Preview Post, please select an existing Product by typing its title. This post is used to show preview data while creating the layout.
- Check the Auto Apply option to apply this template to all WooCommerce product pages. If you are creating a layout for a specific product, you need to uncheck this option.
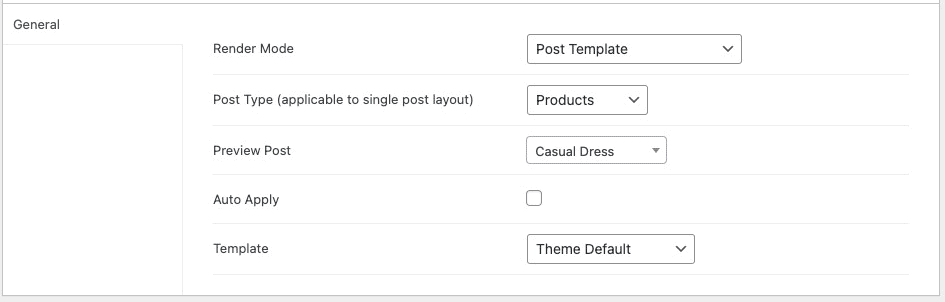
Once done, edit the template in Elementor.
Add Product Widget
You might have noticed that a detailed product page contains many elements like the Product Title, Product Price, Product Image, etc. In this tutorial, we used the AnyWhere Elementor widget for WooCommerce(DA- Woo). So now, let’s start adding the appropriate widgets to get a proper layout for our product page.
Product Title
The DA – Woo Title widget controls the style and layout of the product title.

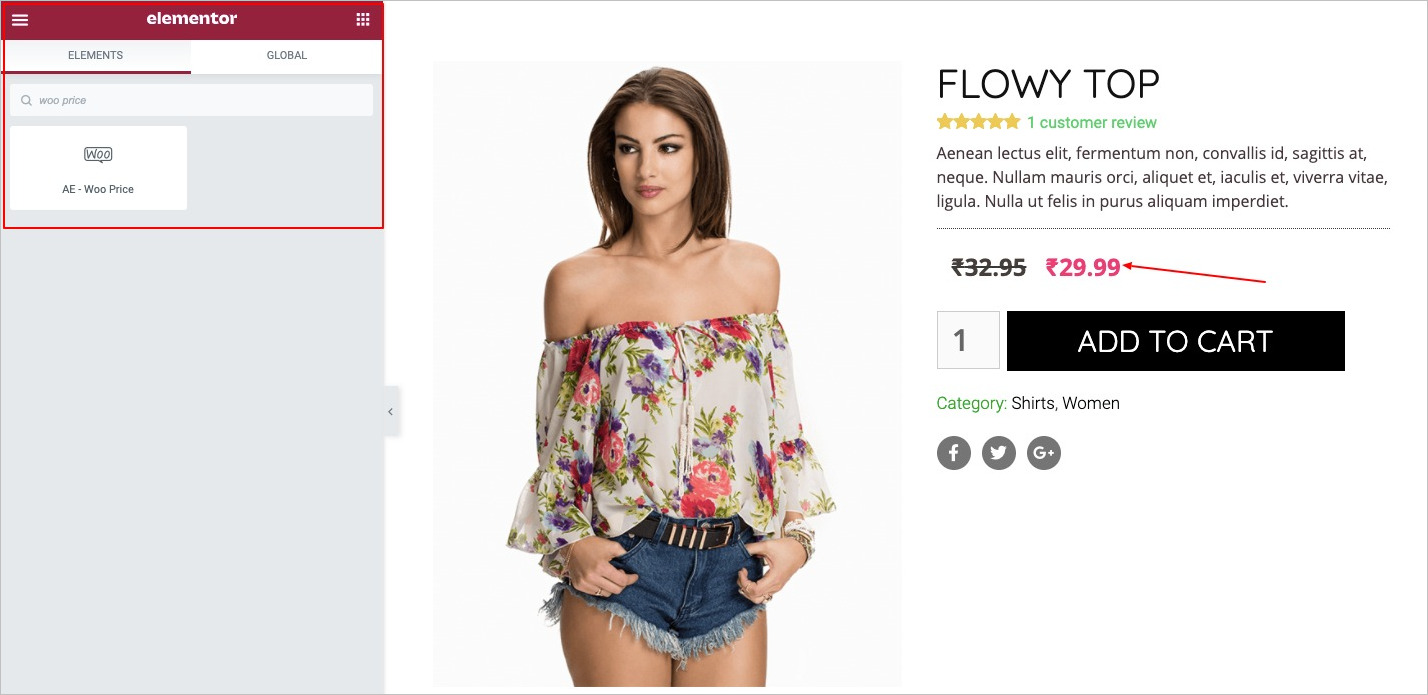
Product Price
The DA – Woo Price widget allows you to set the product price position and style.
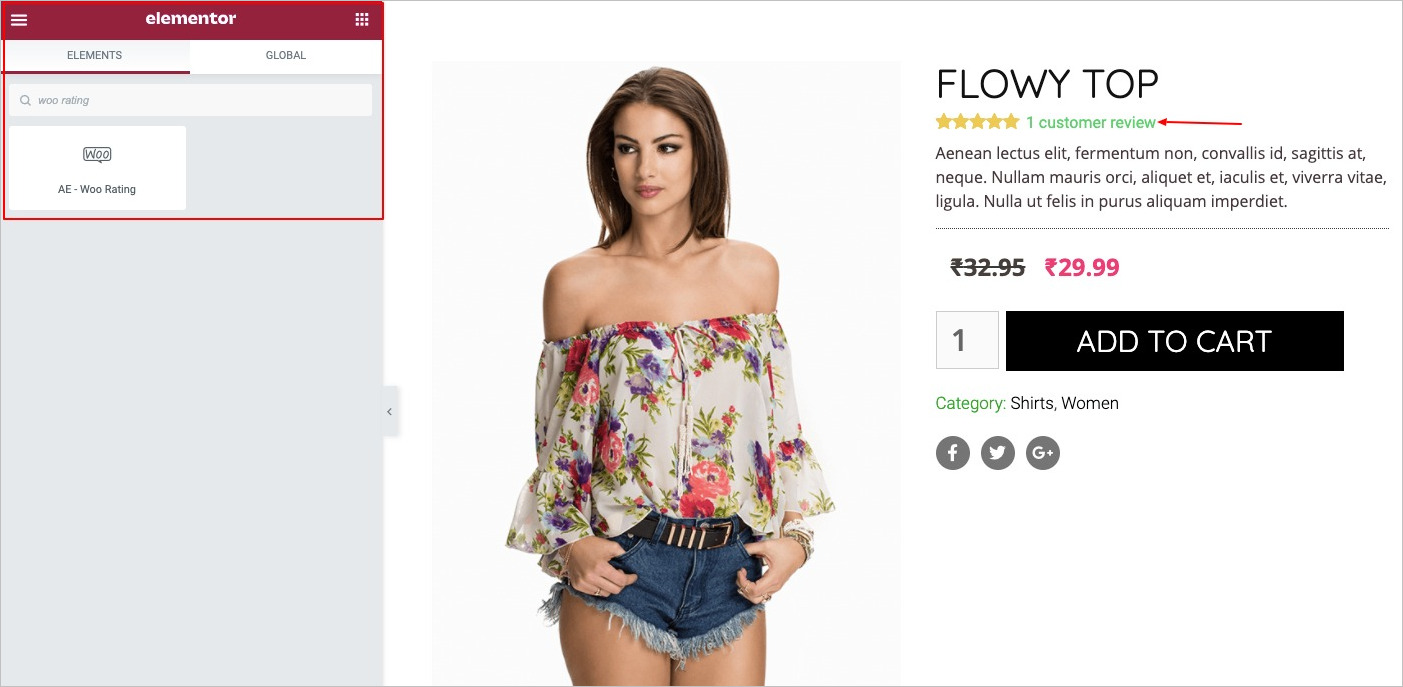
Product Rating
DA – Woo Rating widget lets you display your product ratings. Ratings encourage customers to buy your product and help build product authenticity.
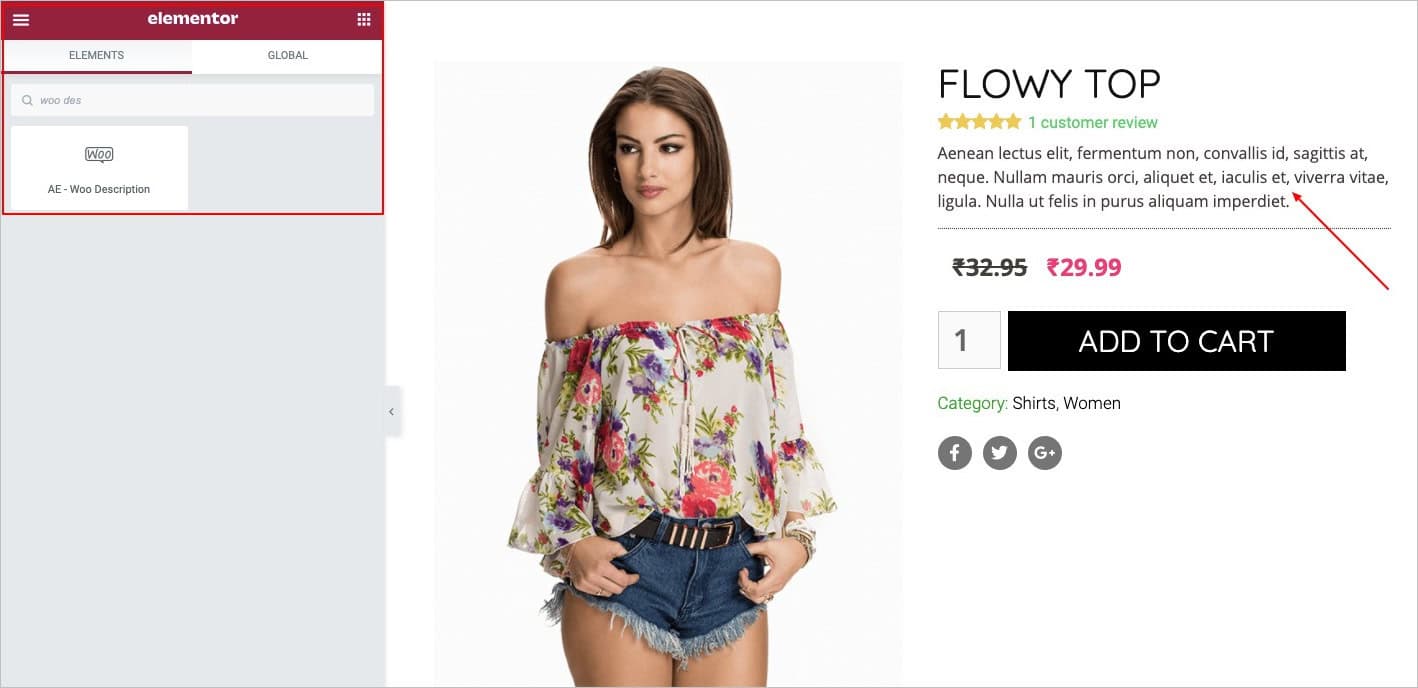
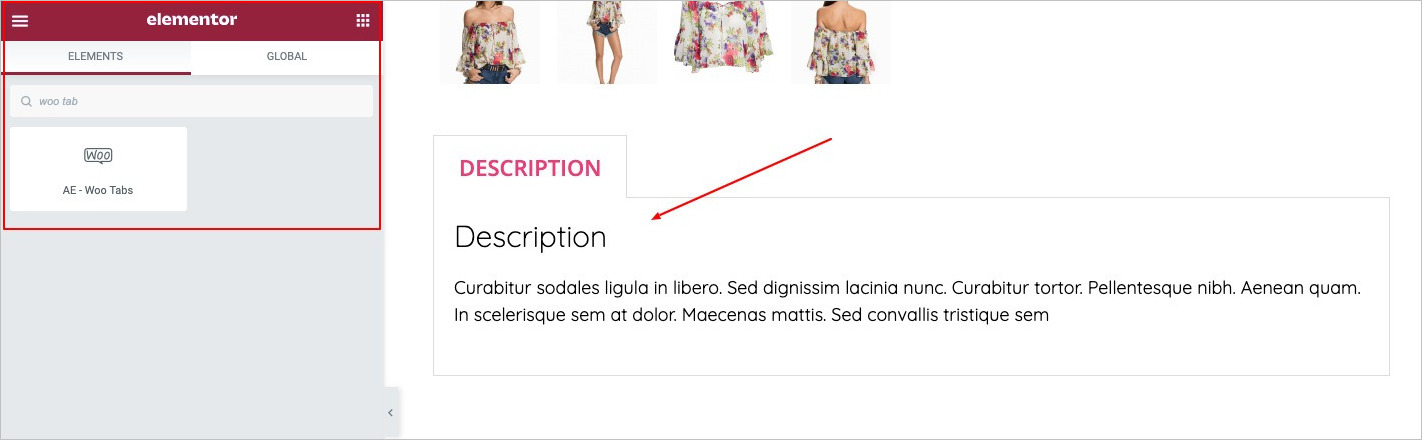
Product Description
Use the DA – Woo Description widget to display the product description.
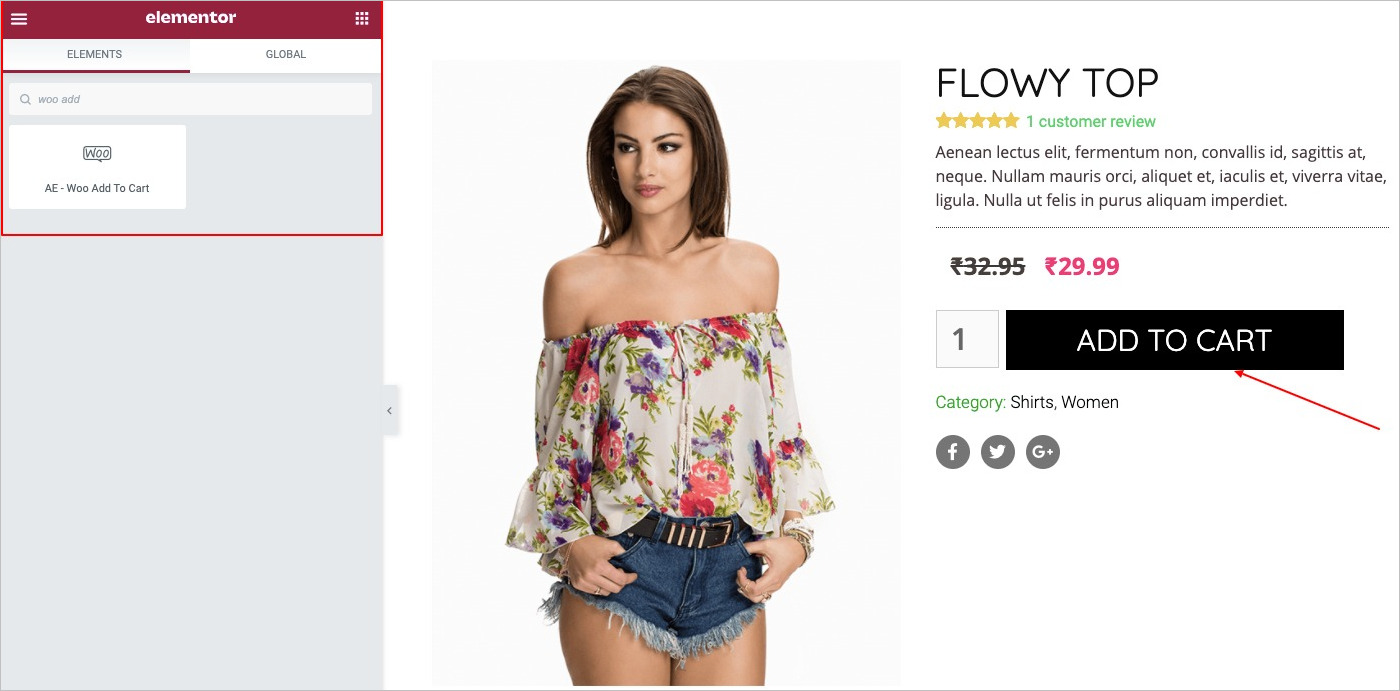
Add To Cart
Add the Call To Action button using the DA – Woo Add To Cart widget. This element is the most important aspect of any product page.
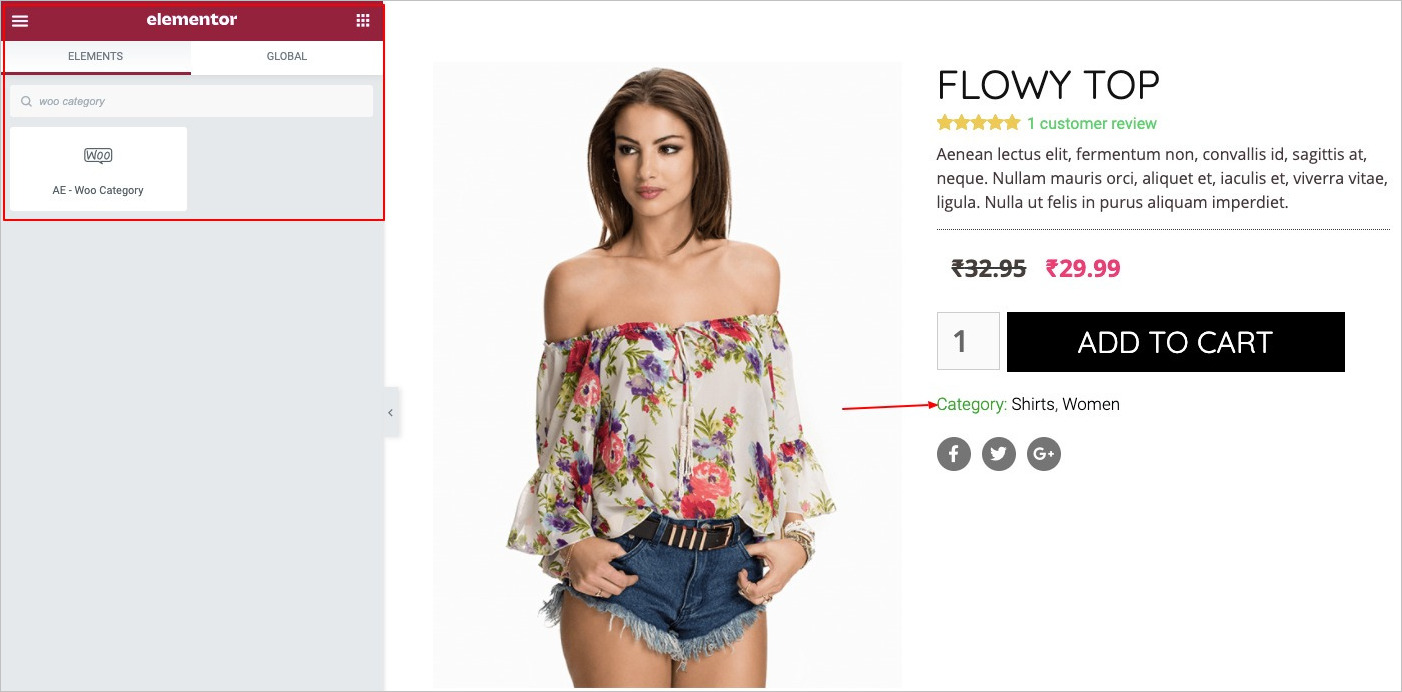
Product Meta
Add the DA – Woo Category widget to display categories and tags related to the product.
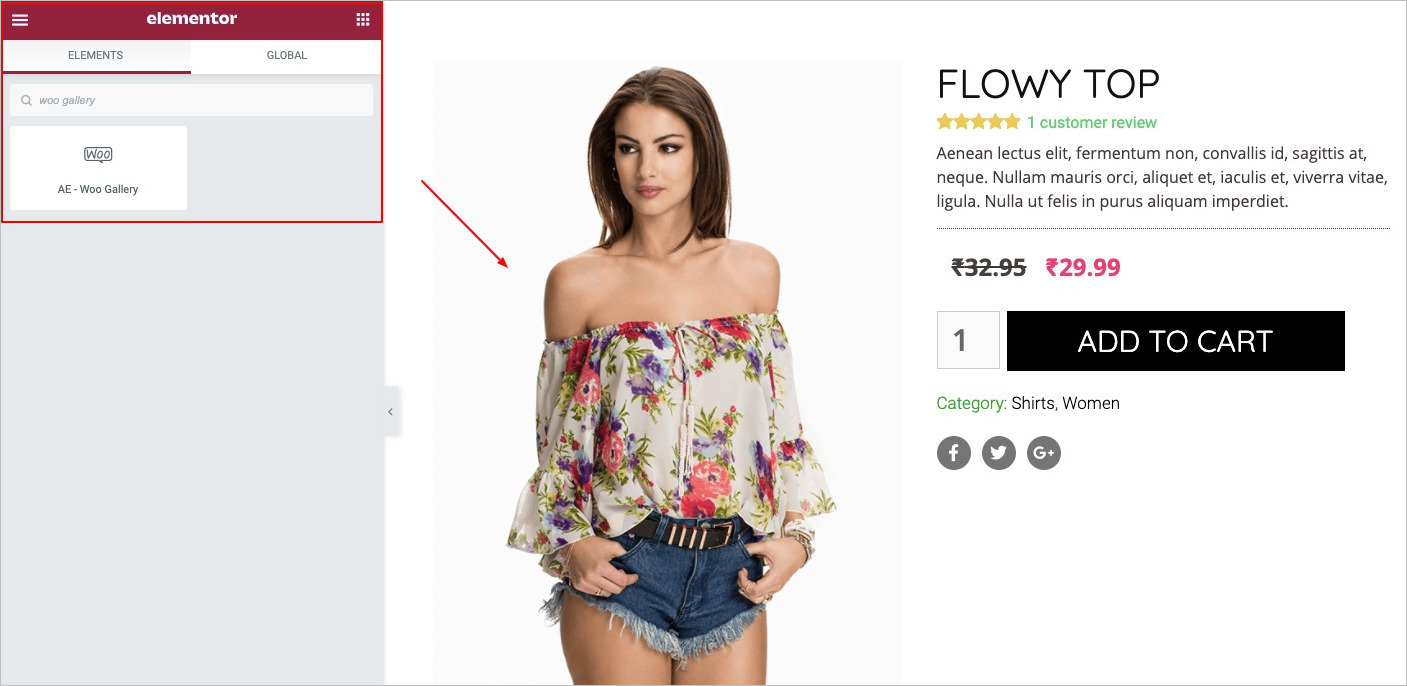
Product Image
Use the DA – Woo Gallery widget to display product-related images. Displaying product pages helps customers get an overview of the product they are interested in.
You can also follow this guide to add videos to your WooCommerce product gallery to give customers a more engaging product experience.
Other Additional Information
To display more information related to the product, use the DA – Woo Tab widget.
Preview and Publish Your Custom Product Page
Once you’ve designed your page.
- Hit Publish to make your custom WooCommerce product page live.
- Preview the layout to ensure everything looks polished.

Start Customizing Your Product Page
You’ve seen how [ae_plugin_name] gives you the design flexibility to customize your WooCommerce Product page comfortably. You can easily create a custom layout that suits not just your needs but also what customers want! With its different Dynific Addons templates, there are so many customization and styling options available.
FAQs About Customizing WooCommerce Product Pages
Can I apply a custom template to only one product page?
Yes! With AnyWhere Elementor Pro, you can disable “Auto Apply” while creating a template and assign your custom template to a specific product only.
Do I need coding skills to customize WooCommerce product pages?
No. With tools like Elementor and [ae_plugin_name], you can create and apply custom designs using drag-and-drop widgets — no coding required.
What is the difference between a default and custom WooCommerce product page?
The default product page has a standard layout provided by WooCommerce. A custom page lets you change the design, layout, and elements using tools like Elementor and AnyWhere Elementor.
Why should I customize the WooCommerce product page?
Customizing the product page helps make your product stand out, improve user experience, and increase conversions by showing only the most relevant and engaging information.
How to create a custom WooCommerce product page?
You can create a custom WooCommerce product page using Elementor and [ae_plugin_name].
Can I customize the Shop page in WooCommerce?
Yes, you can easily customize the Shop page without any coding. For more details, read our full guide on How to Customize the Shop Page.
Can I add videos to my WooCommerce Product Gallery?
Yes, here is the list of plugins, through which you can add videos to your WooCommerce product gallery to create a more engaging and dynamic shopping experience. By default, WooCommerce only lets you showcase products with images.

Leave a Reply