The WooCommerce shop page is a vital part of any e-commerce store, but it can be tricky to customize. That’s why we created this guide for you! Imagine walking into a physical store where the shelves are messy, the products are poorly displayed, and it’s hard to navigate, would you stay and shop?
That’s exactly how visitors feel when your WooCommerce shop page isn’t thoughtfully designed. Your shop page isn’t just a product grid, it’s the gateway to your online sales. A well-customized shop page guides customers smoothly through your offerings, builds trust, and ultimately drives conversions.
The good news? Customizing it doesn’t have to be overwhelming! With the right tools, you can create stunning, user-friendly layouts that elevate your store and boost sales.
In this step-by-step guide, you’ll learn how to transform your WooCommerce shop page into a high-converting, beautifully branded experience, no coding required.
Key Takeaways
- Learn why customizing your WooCommerce shop page is important.
- Explore how to create custom WooCommerce shop pages without coding.
- Find out the tools needed to design your shop page and see how to create a product block layout.
Why Customizing Your WooCommerce Shop Page Matters
- Boost Conversions: A well-designed shop page directs customers to the right products faster.
- Enhance User Experience: Make it easy to browse, filter, and compare products.
- Improve SEO: Optimized layouts reduce bounce rates and improve search rankings.
- Stand Out from Competitors: Custom styling and dynamic layouts help create a unique store identity.
What You Need to Get Started With WooCommerce Shop Page
For designing your shop page to showcase your products online, there are some prerequisites:
- A WordPress Website
- WooCommerce installed
- Elementor + Dynific Addons for Elementor Plugin
- A set of published products to display
After setting up your WooCommerce store and adding your products, the next step is to design your Shop page. Now, let’s start designing the Shop page.
Step-by-Step: How to Customize a WooCommerce Shop Page
To create the shop page design, we need to create a block layout using Anywhere Elementor to render the Post Block widget on the archive template.
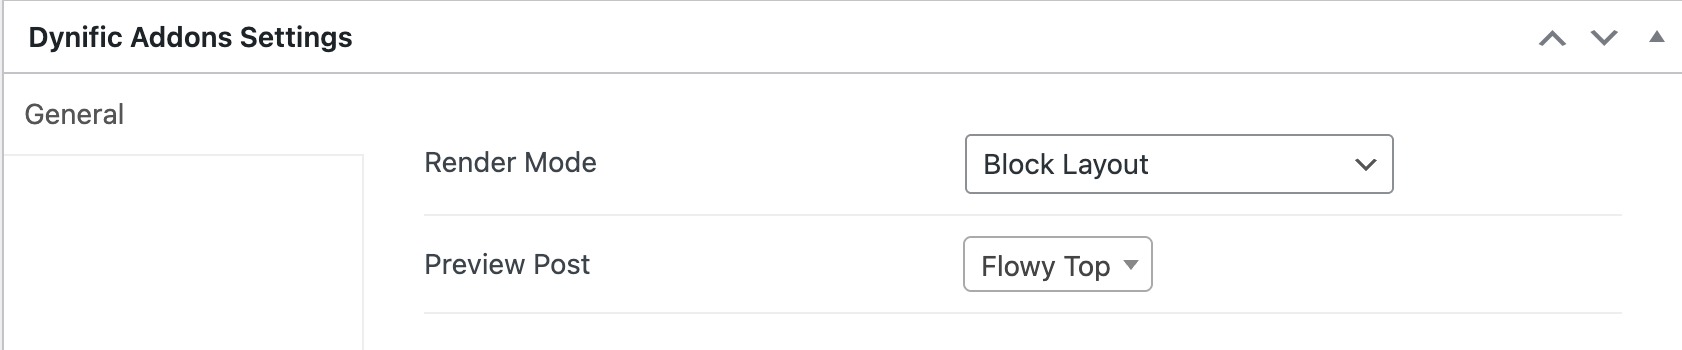
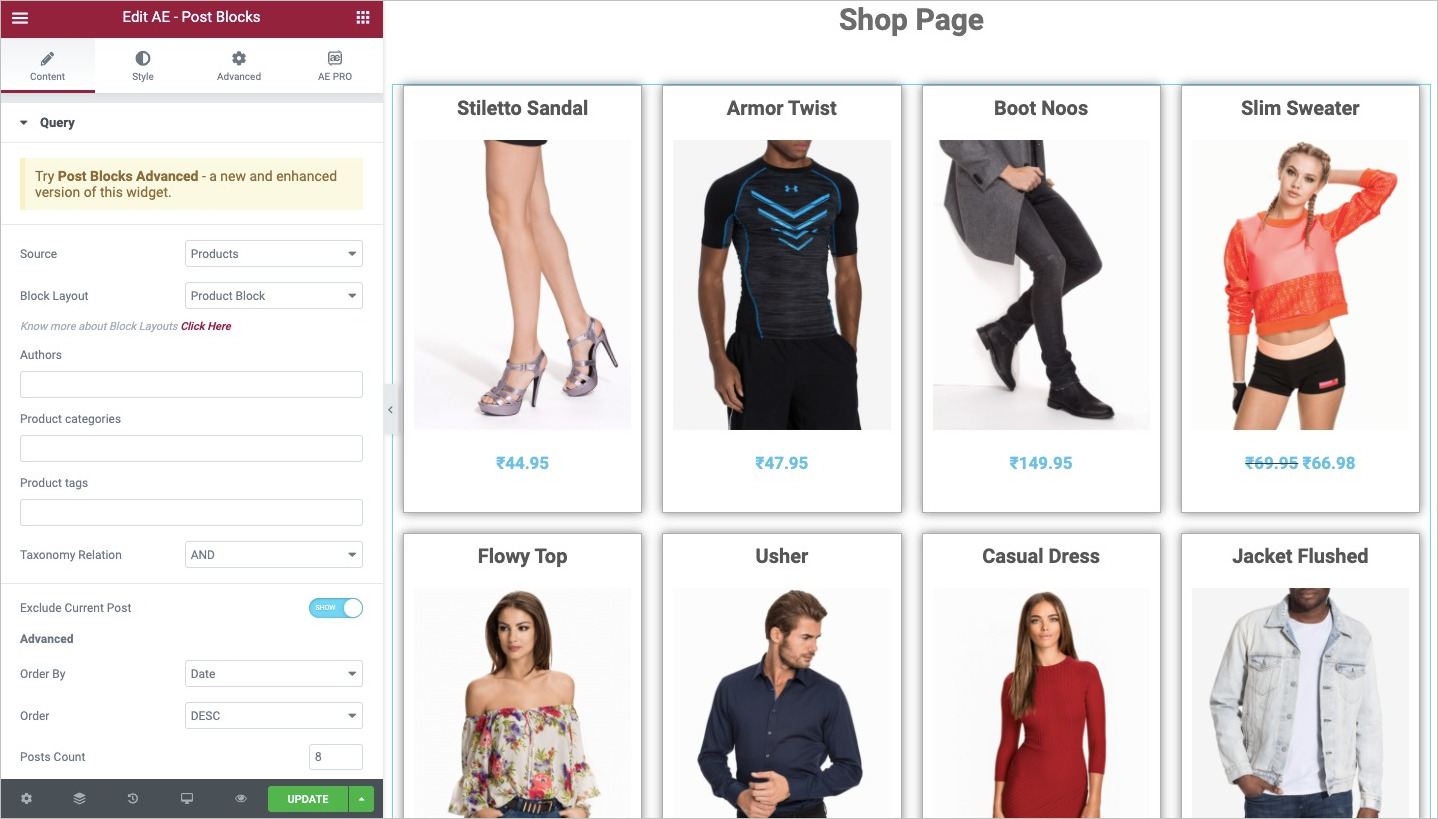
Step 1: Creating Block Layout
- Navigate to your WordPress admin dashboard and click on the Dynific Addons Template -> Add New.
- Start with assigning a name to the template. Then, under the Dynific Addons settings, you need to make some configurations, like selecting the Block Layout option under the Render Mode and select any Product posts as a Preview Post.
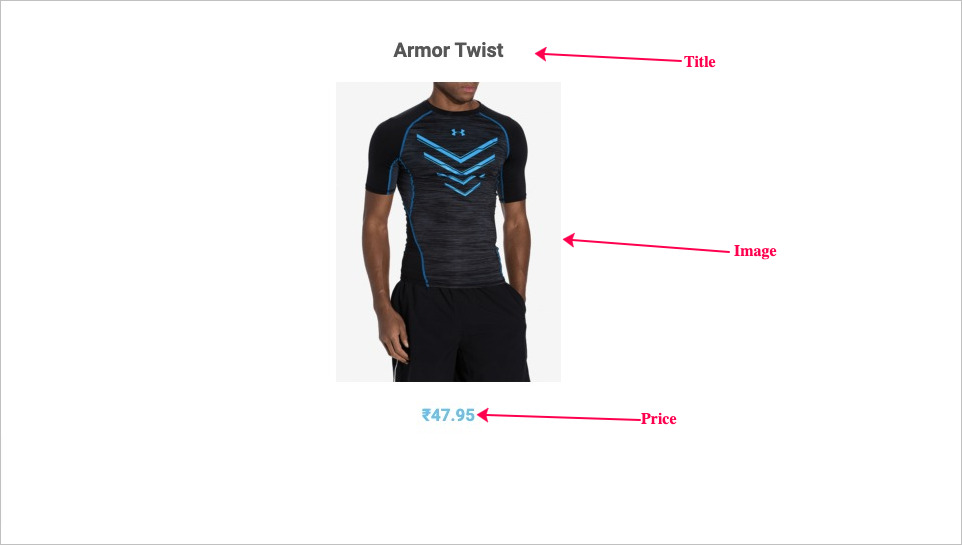
- Edit the template in Elementor, start with adding a section, and then design the layout style for the blocks.
- Next, add the widgets to get dynamic content from the post, and once done with creating, publish the block template.
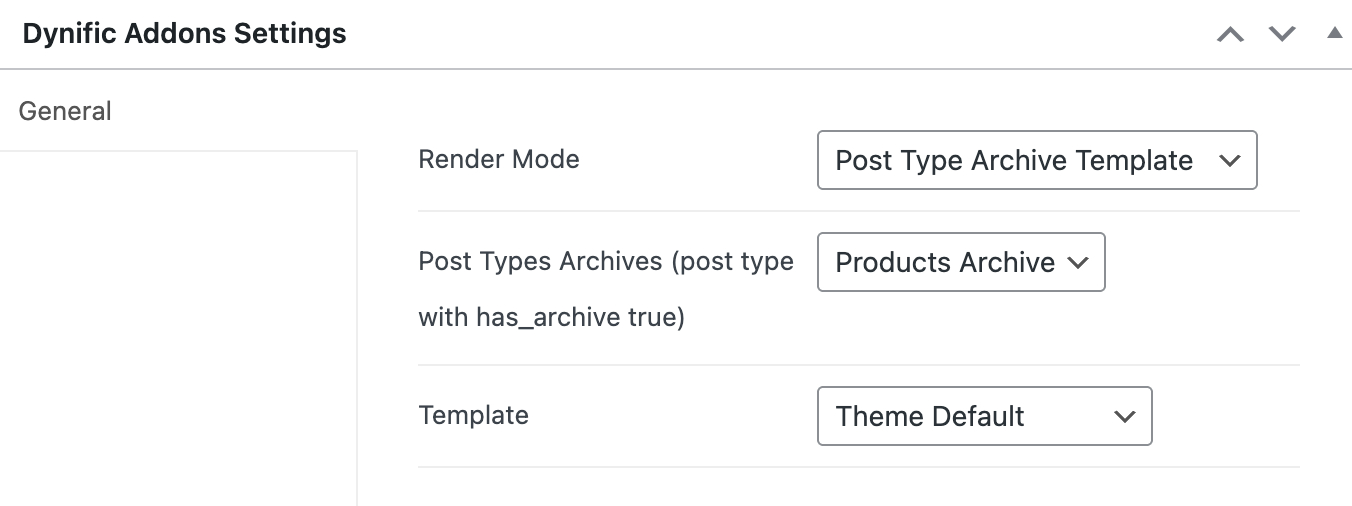
Step 2: Creating Post Archive Template
Now we have the block layout designed so we can move on with creating the Shop Archive Page.
To design the Shop Archive page, add another Dynific Addons Template, configure the following settings, select the Post Type Archive option under the Render mode, and choose WooCommerce Products Archives as Post Archives.
Next, in the Elementor editor, add a section and showcase your products in a Grid manner; insert the DA-Post Block widget of [ae_plugin_name] (you can also use the DA-Post Block Adv widget).
After inserting the Post block into an Elementor section, it’s time to Configure the Post Blocks.
- First, in the Source option, choose Products, and then select the Block layout that we have created in the previous step.
- Next, do some other settings like adjusting the amount of space between Columns, enabling the pagination and adjusting its controls, and adding advanced filters to filter the products based on certain conditions.
You are done; it’s time to hit the Publish button. Now let’s have a look at our Shop page and see how things have turned out.
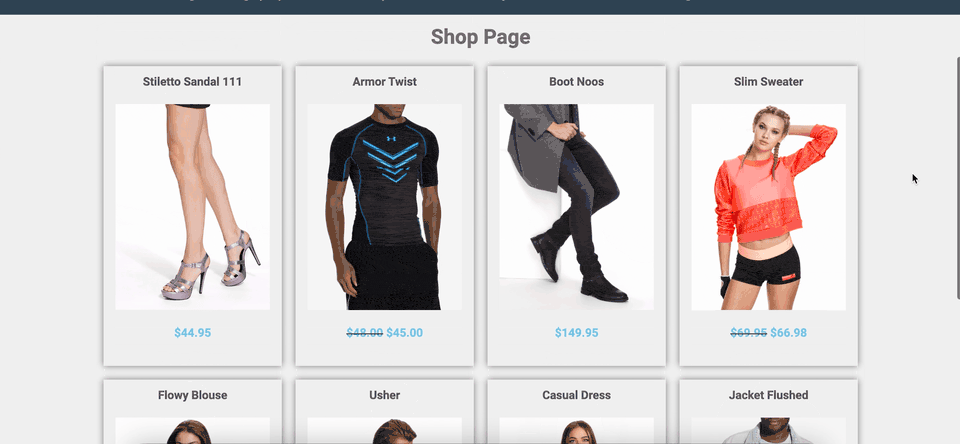
Start Customizing Your Shop Page
It’s worth taking the time and investing in your WooCommerce shop page because customers won’t buy anything if they don’t think it looks good. But, of course, now that you have a better understanding of how WooCommerce stores should look, we’ll leave it up to you if the store needs any more tweaking.
FAQs on Customizing Shop Page in WooCommerce
What is a WooCommerce Shop page?
It’s the archive page that displays all your products in a grid layout. It acts like a digital storefront for your online store.
Do I need coding skills to customize the Shop page?
No, you can design and customize your Shop page without writing any code using Elementor and Dynific Addons for Elementor.
What is a Block Layout in AnyWhere Elementor?
A Block Layout is a design template used to display individual products within a grid. You can design it once and reuse it across your Shop page.
What’s the difference between the WooCommerce shop page and category pages?
The shop page shows all products by default, while category pages display products filtered by specific categories or tags.
What are the best practices for designing a WooCommerce shop page?
Focus on clean design, clear product images, intuitive navigation, mobile responsiveness, fast load times, and strong CTAs.
How do I set a custom WooCommerce shop page as the default shop page?
Go to WooCommerce ➝ Settings ➝ Products ➝ Shop Page and select the custom page you want to use.
Can I customize the Single Product page in WooCommerce?
Yes, you can easily customize the Single Product page without any coding. For more details, read our full guide on How to Customize the Single Product Page in WooCommerce.
Leave a Reply