Struggling to figure out how to add products to your WooCommerce store?
Whether you’re launching your first product or managing a large catalog, adding products correctly is key to running a successful eCommerce business. Adding products in WooCommerce is really straightforward, even if you’re new to using WordPress. But if you’re feeling unsure, no worries!
In this guide, we’ll walk you through every step — from entering product info and pricing to uploading images, setting inventory levels, and more — so you can start selling fast.
Key Takeaways
- Discover how you can easily add products in WooCommerce.
- Learn how you can upload product images, set prices, assign categories, and manage inventory from one screen.
- Choosing the correct product type (simple, variable, etc.) is essential for an optimized buying experience.
- Explore using attributes and variations to allow customers to select sizes, colors, and more.
How to Add Products in WooCommerce
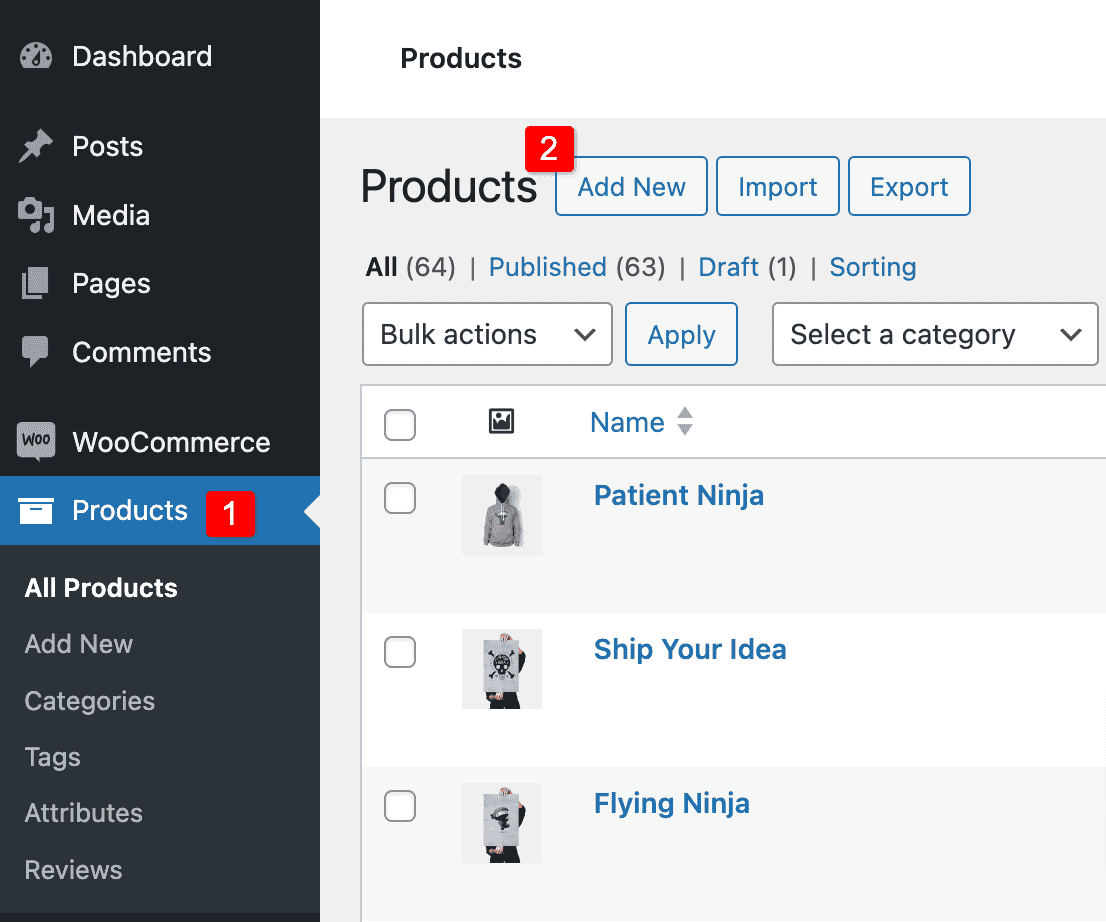
To add products to your WooCommerce store, navigate to your WordPress admin dashboard and click Products -> Add New.
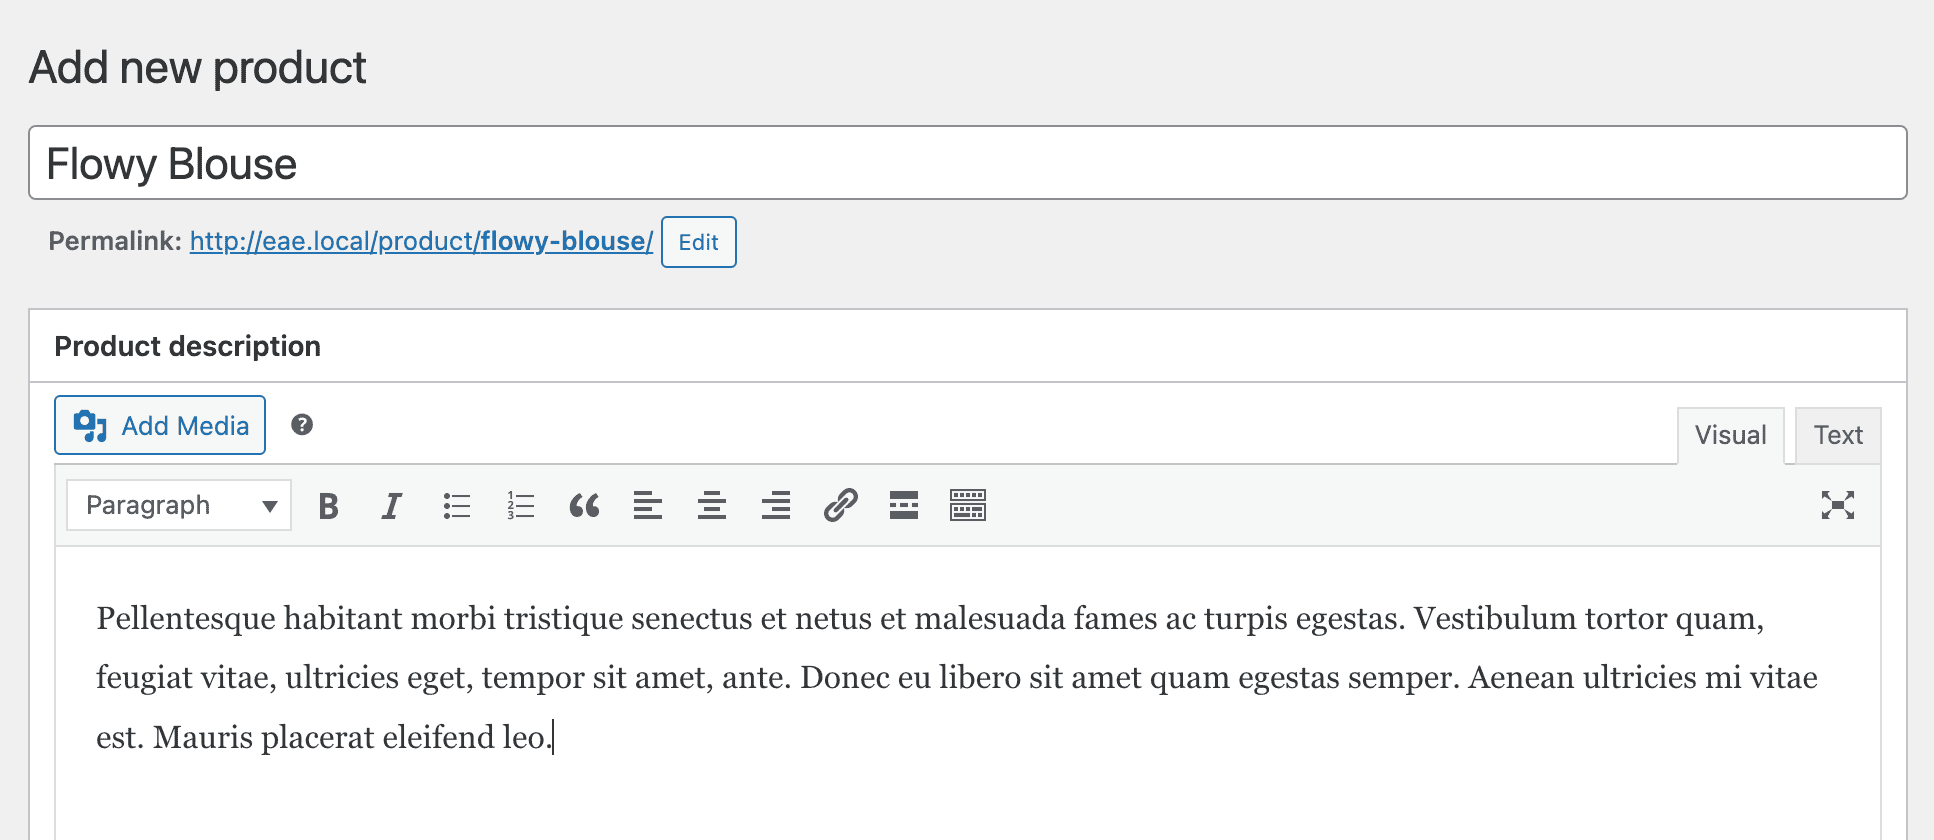
Title & Description
After selecting the products, you’ll need to provide the name of the product for the title. Then, you can write a detailed description explaining why your product is beneficial.
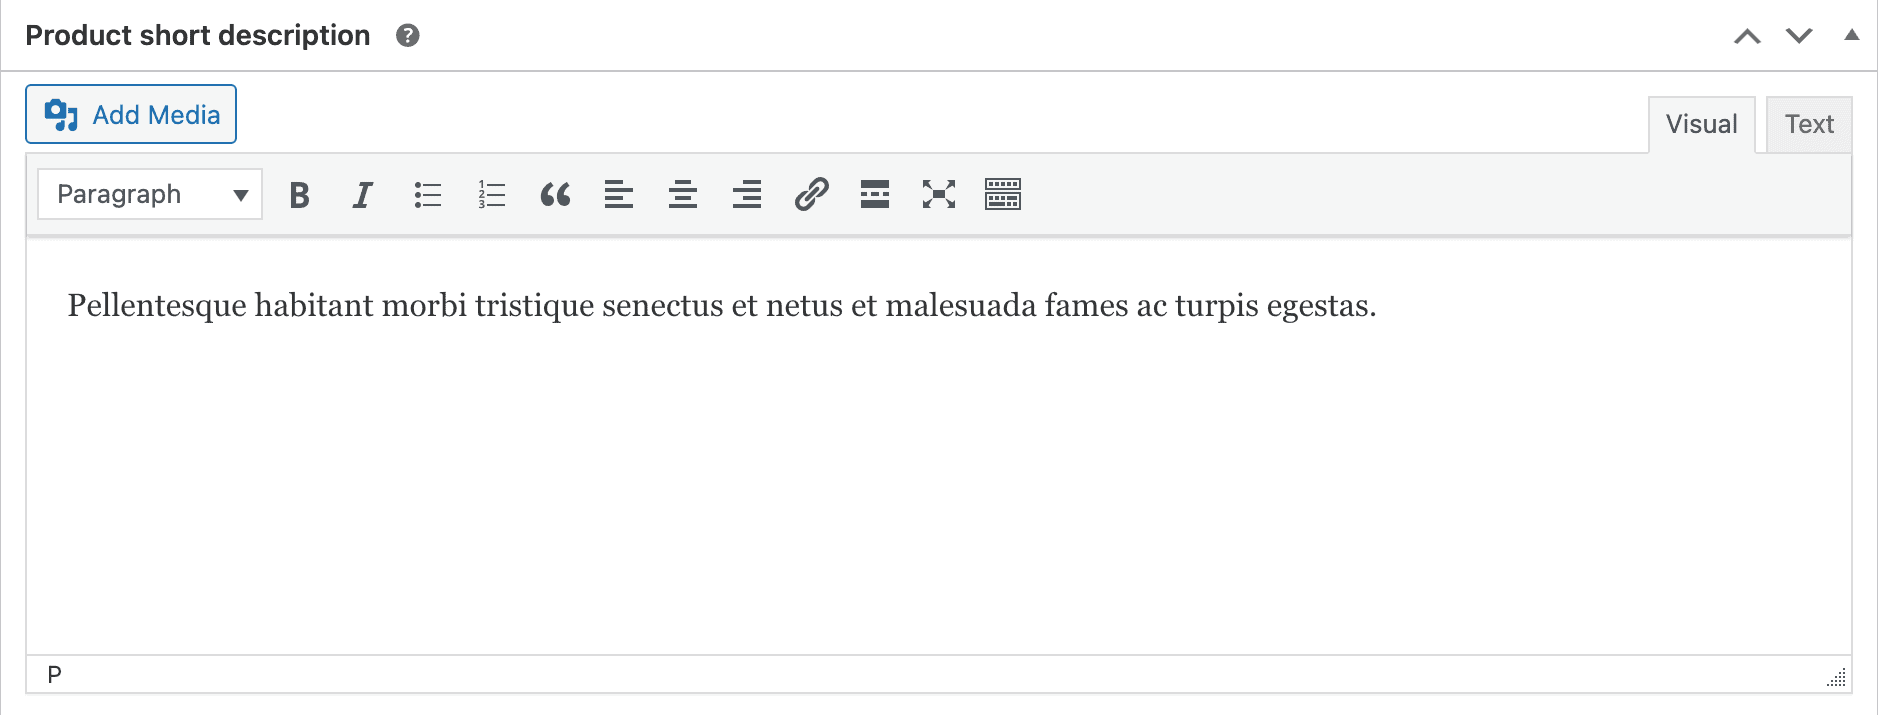
Short Description
When you scroll down the page, you’ll see an option where you can write a short description of the product. This is the first thing customers will see when they view the product details, like the price and other information.
Beyond descriptions, customer reviews also play a key role in building trust and driving sales. You can learn more in our guide on unlocking the power of WooCommerce Product Reviews to Boost Sales in 2025.
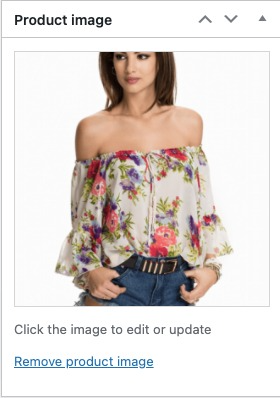
Product Image & Gallery
Next, you’ll want to include a product image. On the right side, under the “Product image” section, click on the “Set product image” link.
Then, it will open the WordPress media library. Here, you can add images from your system or choose from the media library. Once you’ve picked the images you want, click the “Set product image” button.
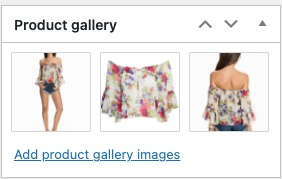
After you’ve set up your product image, you can make it even better by adding a product gallery. This lets your customers see lots of pictures of the product, all on one page. Just go to the Product Gallery section and click on “Add product gallery images.”
You can also edit WooCommerce Products directly from the frontend using our Frontend Product Editor plugin.
Include Categories & Tags
On the right side of the page, you can organize your products better by adding categories and tags. Just like how we organize our blog posts in WordPress, categories and tags help visitors find products easily in your online store.

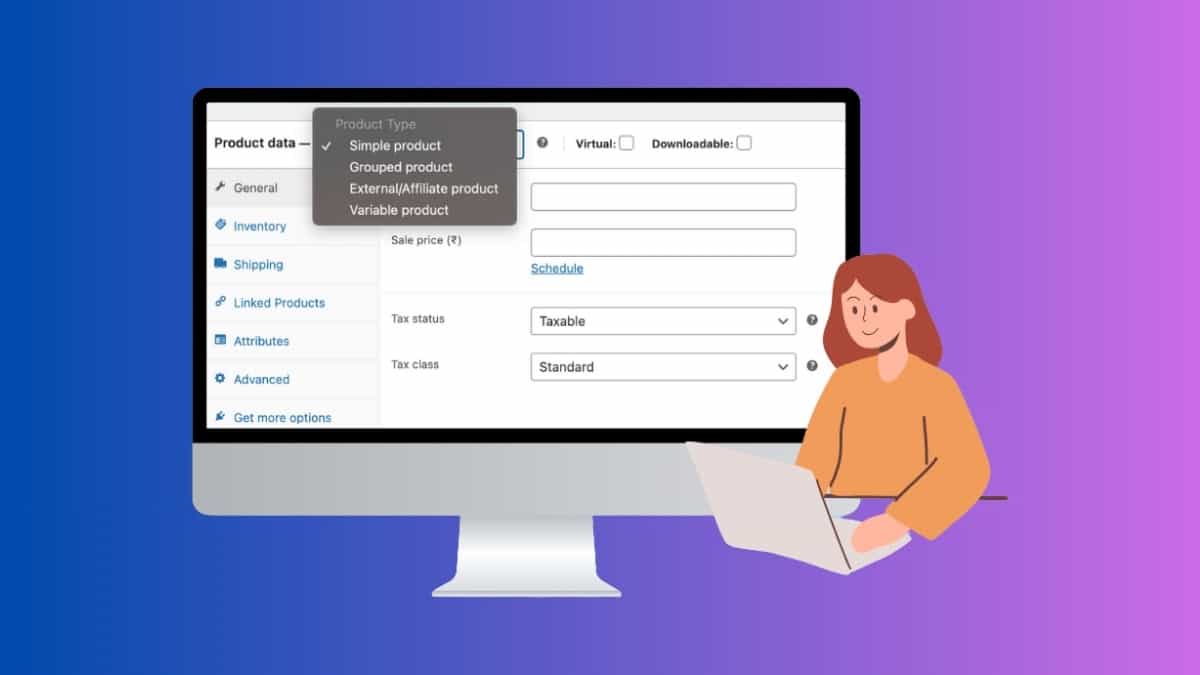
Choose WooCommerce Product Types
After you’ve filled in all the information about the product, at the beginning of this section, you’ll see product data. Next to it, there’s a menu that lets you choose what type of product it is. By default, it’s set to ‘Simple product.’ However, you can pick from different types of products by selecting from the dropdown menu.
With WooCommerce, you can use different types of products depending on what you’re selling. There are six main types of products to choose from.
- Simple Products: In most WooCommerce stores, the usual product you’ll deal with is the simple one. It’s straightforward and perfect for selling individual physical items. It is the default product type in WooCommerce whenever you add a new product.
- Grouped Product: A grouped product is like a bundle of already existing items in your store. It’s when you combine two or more single products that go together. Instead of making something new, you’re just putting existing products into your store.
- External/Affiliate Product: Selling external or affiliate products in your store means you can offer items even if you’re not the actual seller. It’s a convenient way to partner with other stores. Just add the product link and a button text for buyers to click. When they click, they’ll be redirected to another website to complete the purchase.
- Variable Product: Variable products let you sell items in your store that come in different variations. For example, think about shoes or bags that come in various sizes and colors, and sometimes with slight design differences.
- Virtual Product: A virtual product is a type of simple product that you can’t touch or hold, like a service or a subscription to a website. It’s great for selling things online that you can use right away without needing to be delivered to your doorstep.
- Downloadable Product: A simple type of product that you can get from the internet. It can be either virtual or physical. For example, if you sell a music album, you might offer it for download or as a physical CD.
Take a look at our detailed article about the Product Types in WooCommerce that you can use.

Configure Product Details
Once you pick the type of product, you’ll see some tabs on the left side of the screen. These tabs help you enter details about the product. It’s pretty simple, you just fill the details in the boxes with the right information. The fields you see will change based on the type of product you’re working with.
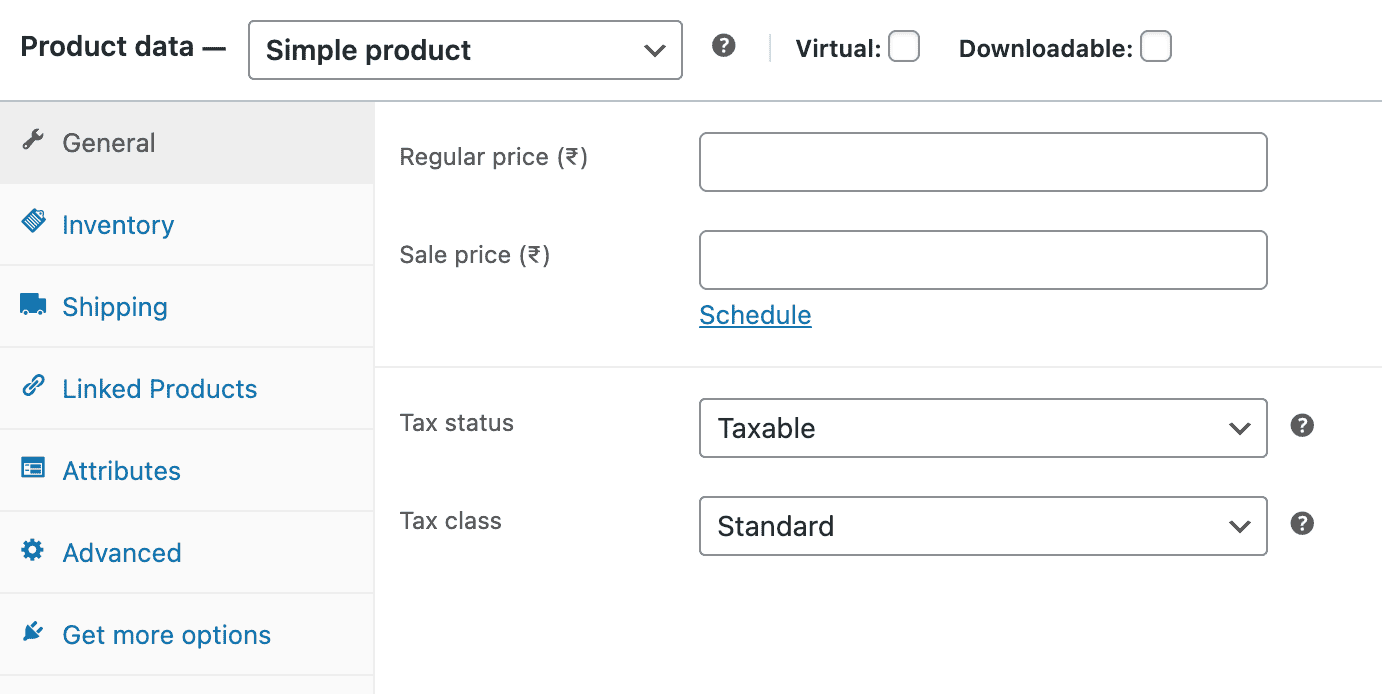
General
In the General tab, you can set the regular price that shoppers will normally see and the sale price for when you want to offer a discount. By default, WooCommerce highlights discounted items with a simple ‘Sale’ badge. If you’d like to make that badge stand out and attract more buyers, check out our guide to customizing your WooCommerce sale badge.
You can also choose whether the product should have tax added to it and, if so, which tax class to apply.
Additionally, there’s a helpful Schedule feature that lets you automatically start and stop the sale on specific dates, saving you from having to change the price manually.
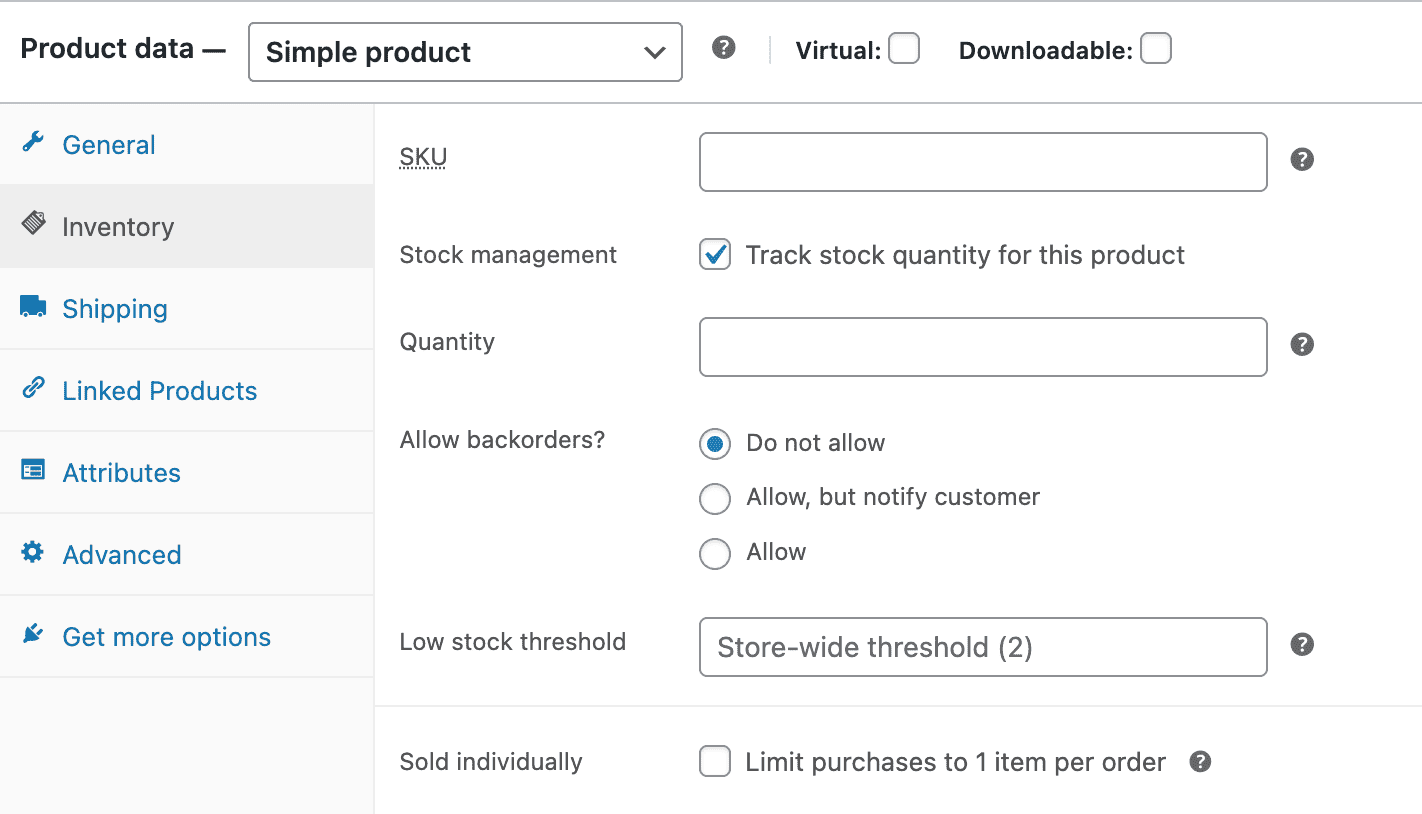
Inventory
In the Inventory section, you can keep track of how much of your product you have and control its availability.
If your product comes in different types or versions, you have to check the “Stock Management?” box for each one so you can manage how much of each type you have available.
- SKU: SKU stands for Stock Keep Unit, and it is a unique number assigned to every product for tracking. You can either set the SKU manually or use a WordPress plugin to generate unique SKUs.
- Stock Status: If you have a product in your stock, leave this set to In stock. If you don’t have it, you can change the status to Out of Stock.
- Sold individually: If you check this box, customers can only buy one of these products at a time.
If you select the “Stock Management?” option, you’ll see some new choices, including.
- Quantity: In the ‘Stock Quantity’ section, you just enter how many of the products you have. If your product has different variations, you’ll need to enter the quantity for each variation separately.
- Allow Backorders: If you choose to allow backorders, customers can still buy a product even if it’s currently out of stock. You can then decide how you want to handle these backorders: either not allowing them at all, allowing them but letting the customer know, or just allowing them without any notification.
- Low Stock Threshold: The low stock threshold is the point where you’ll get a notification that your stock is running low. You get to pick the quantity number that triggers this notification.
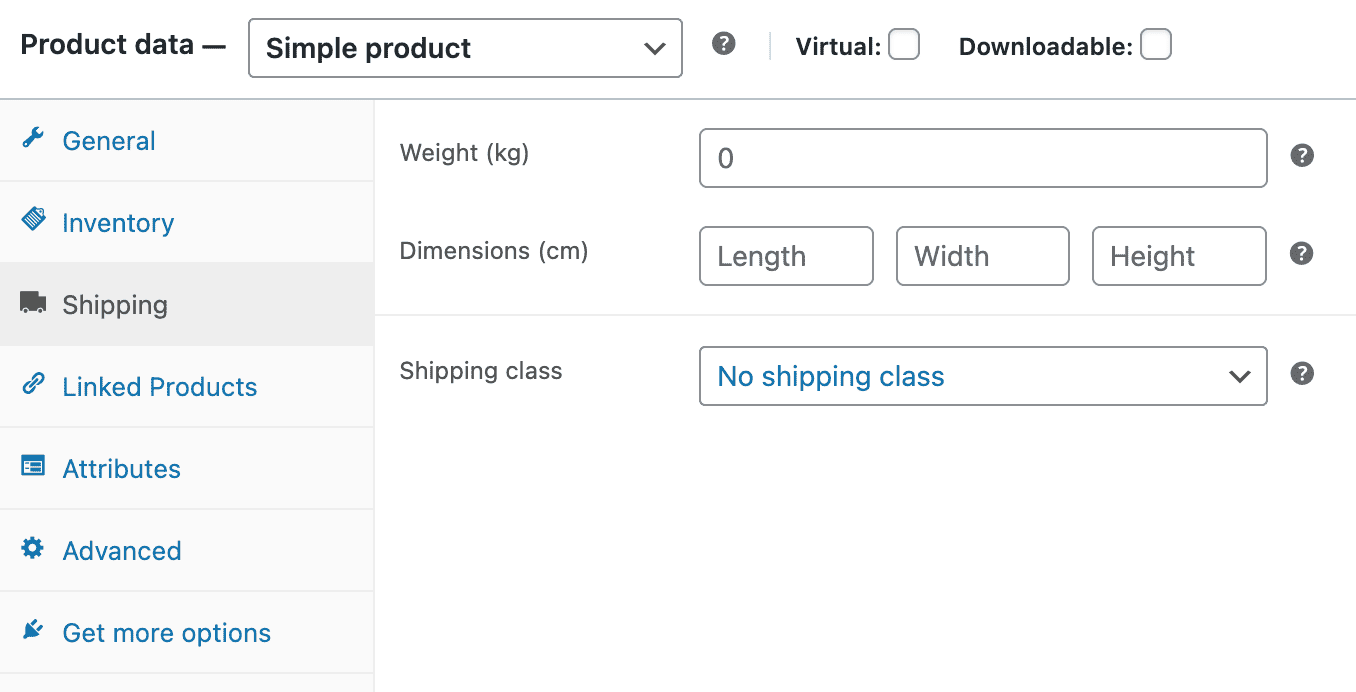
Shipping
In the Shipping section, you can enter details about how your product will be shipped. You’ll need to provide information like the weight of the product in pounds or kilograms and its dimensions in centimeters (length, width, and height).
You can also assign WooCommerce shipping classes to specific products using the ‘shipping classes’ option.
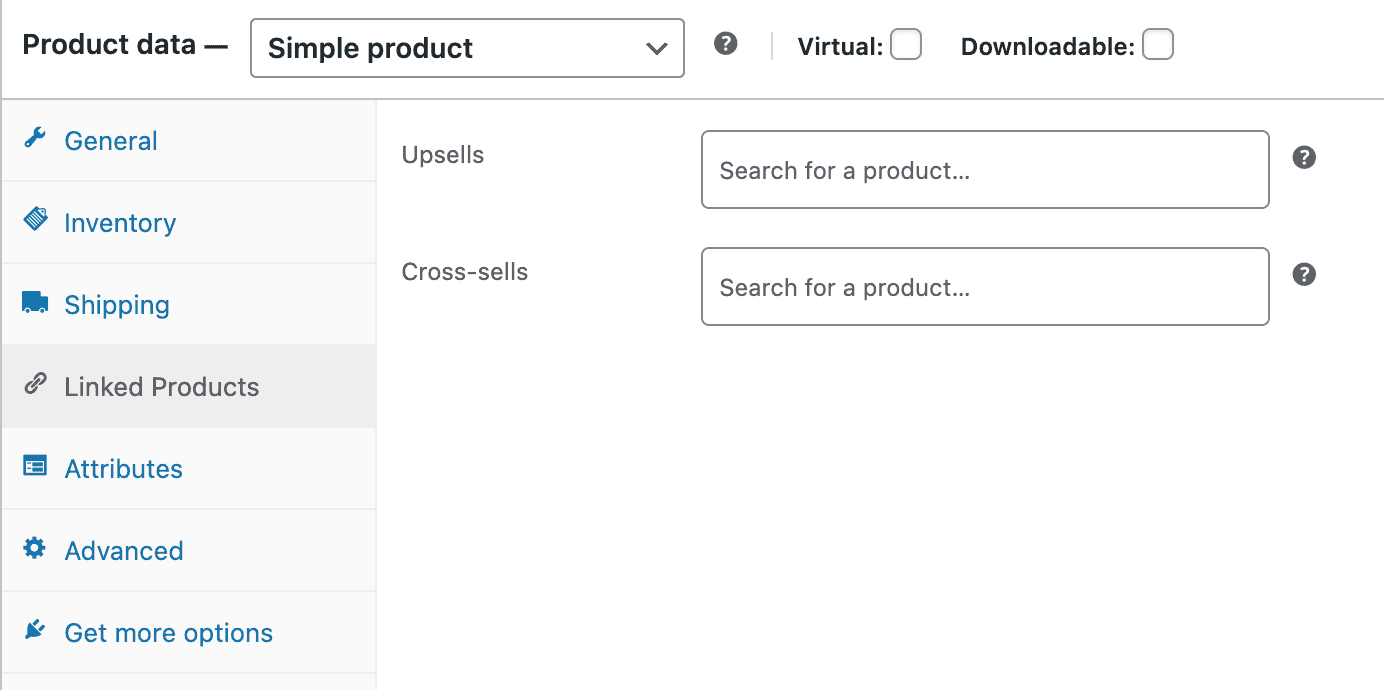
Linked Products
Linked products are suggestions to help stores make more money. There are two main ways to do this: one is by showing similar items that customers might want to buy together (cross-sells), and the other is by recommending pricier products with extra features to make the original product seem like a better deal (upsells).
Check our detailed article on Up Sell & Cross Sell in WooCommerce.
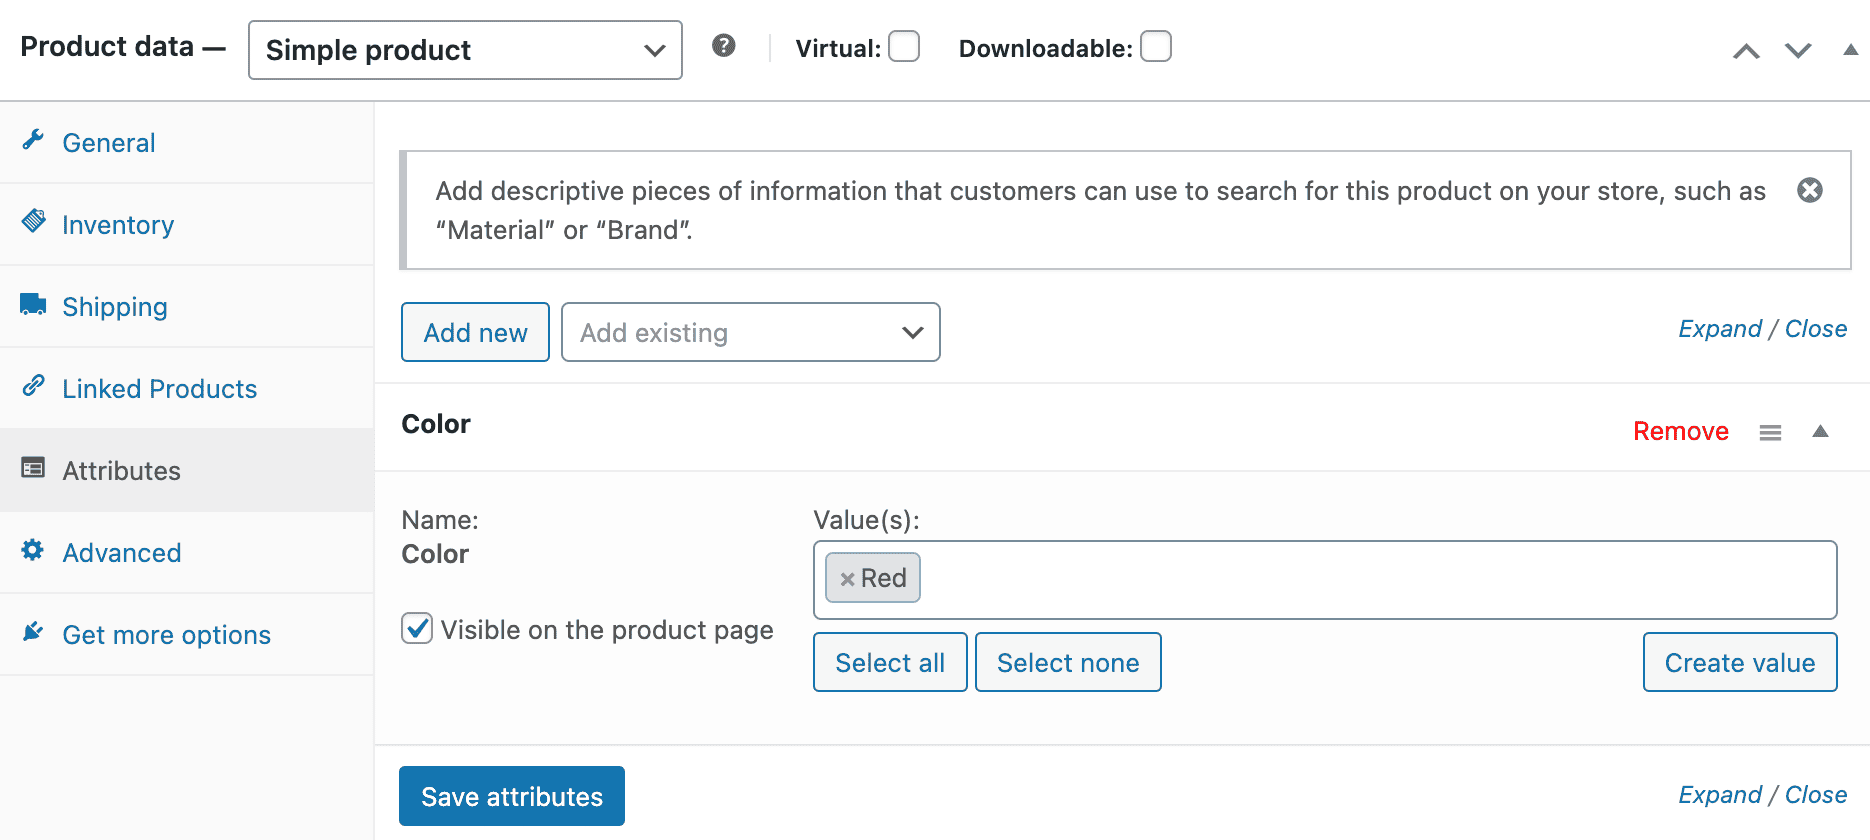
Attributes
In the Attributes section, you can give more details about the different types of products you’re selling. Attributes are bits of information that describe a product, like its color, size, or material. For instance, if you’re selling a top, you can use the color attribute to show different colors and the size attribute to show different sizes.
To add an attribute, press the “Add” button. Then, a new row will show up where you can type in the name and the value. When you finish, hit the “Save Attributes” button.
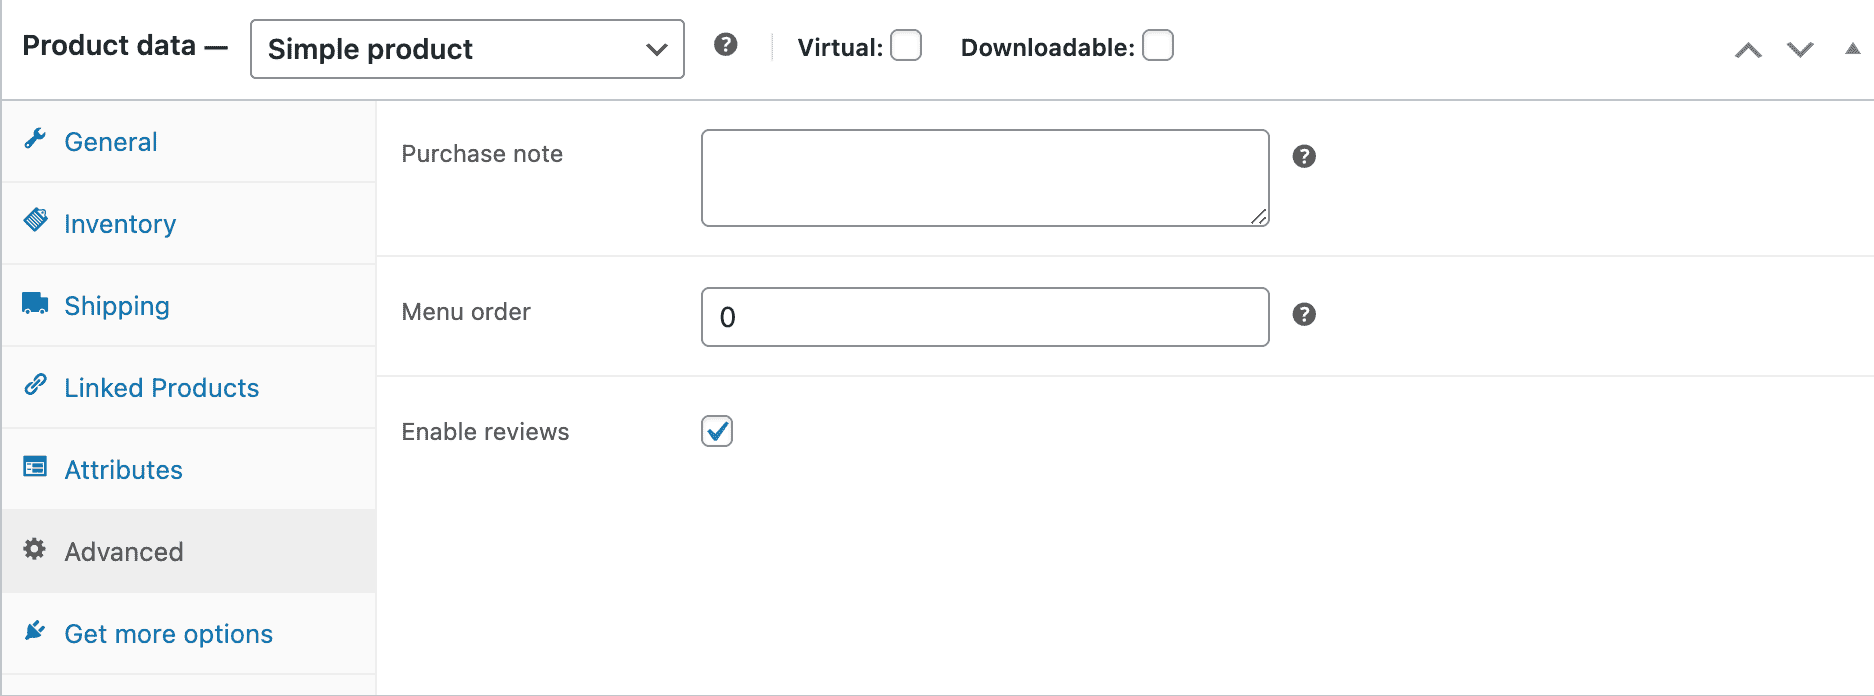
Advanced
In the Advanced tab, you can add a note that customers will see after they place an order. You can also choose where the item appears in your list of orders and allow customers to leave reviews by checking a box.
Publish Your Product
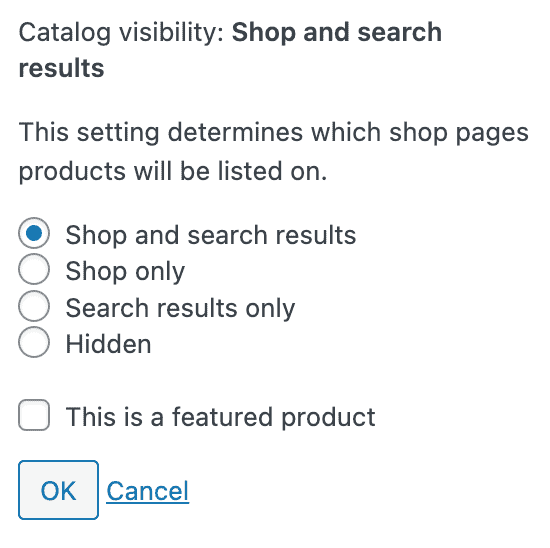
Under the Catalog Visibility option, you decide where your product shows up: either in the main shop area, in search results, or hidden altogether. You can also highlight it by marking it as a “featured” product.
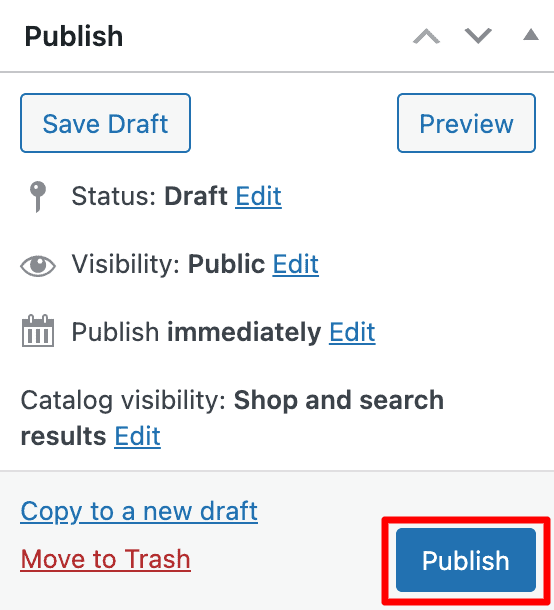
Once you’re done setting up everything for your product, the final step is to make it available for others to see. To do that, just go back to the top of the page and click on the Publish button.
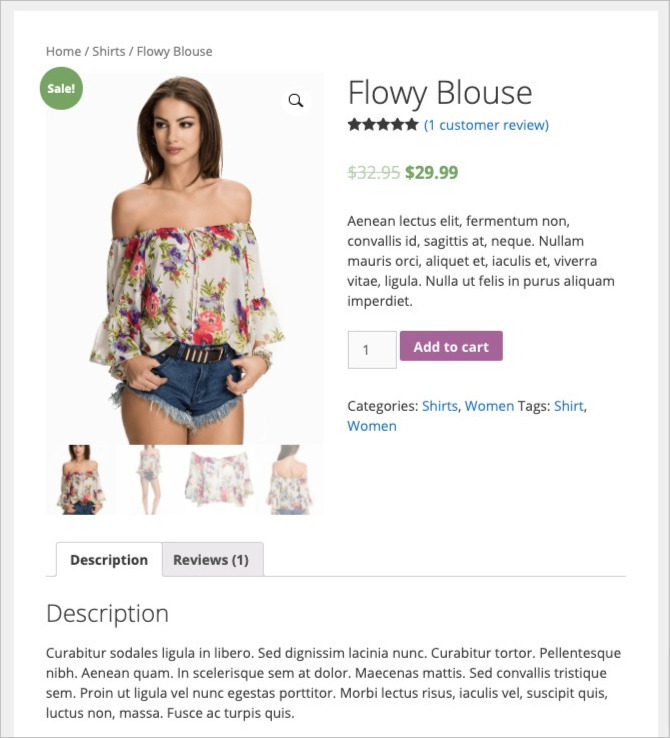
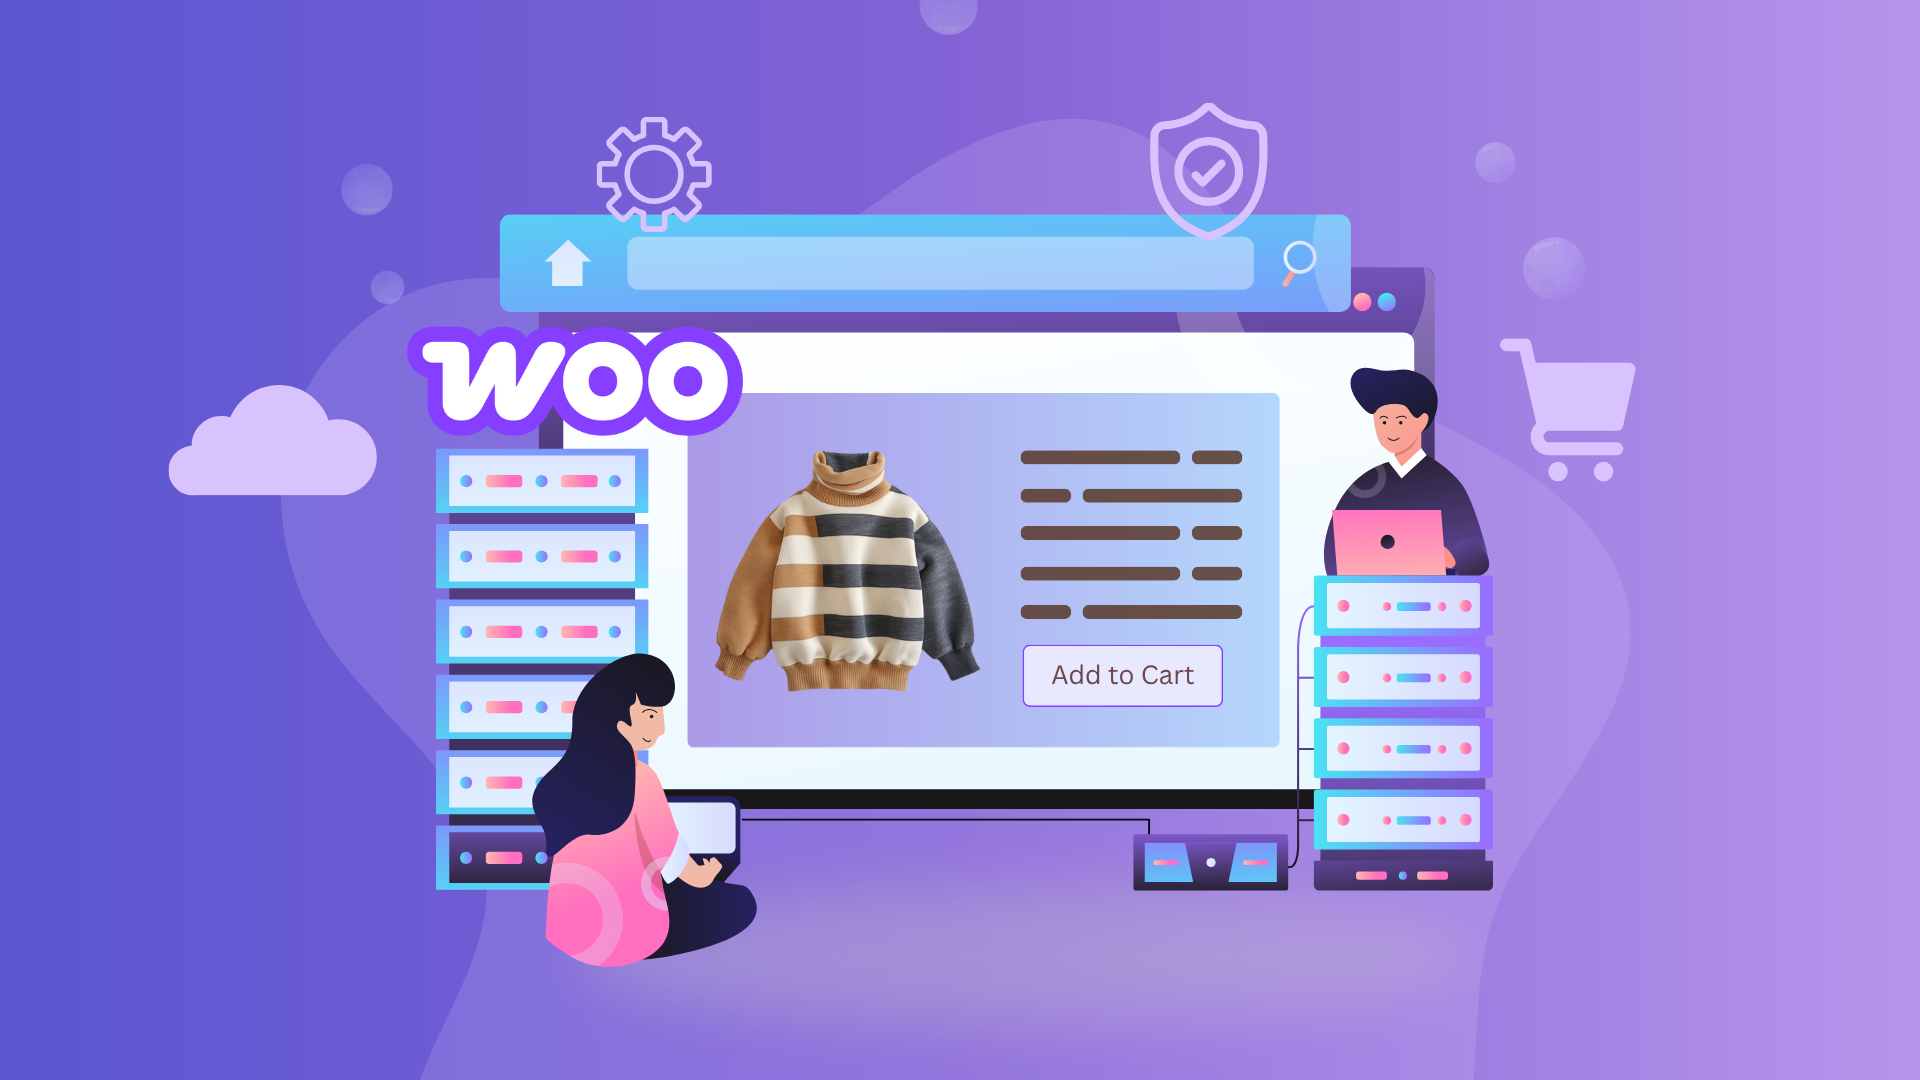
This is an example of how your product could appear on the front of your website. But remember, the exact look will vary depending on the theme you pick for WooCommerce.
Get Started with Adding WooCommerce Products
Adding products to your WooCommerce store is a straightforward process. By following the steps outlined in this article, you can easily add products to your store and showcase them to potential customers. With WooCommerce’s user-friendly interface, you can efficiently manage your inventory and create a seamless shopping experience for your customers.
FAQs on Adding Products in WooCommerce
How do I add a product to WooCommerce?
Go to Products > Add New in your WordPress dashboard. Enter the product name, description, price, image, and publish it. You can also assign categories and set inventory.
What’s the difference between simple and variable products?
A simple product has no options — it’s a fixed item. A variable product lets you offer variations like size, color, or material with different prices or stock levels.
Can I import bulk products to WooCommerce?
Yes, you can use the built-in CSV importer in WooCommerce under Products -> Import. This is useful for adding many products at once. Learn about: Importing & Exporting WooCommerce Products.
Can I edit WooCommerce products from the frontend?
Yes, with plugins like Frontend Product Editor, you can manage and edit WooCommerce products directly from the frontend without logging into the WordPress dashboard.
What is the difference between product tags and categories in WooCommerce?
Categories are for broad grouping (e.g., Clothing, Electronics), while tags are more specific attributes (e.g., Red, Cotton, Waterproof) that help with filtering and search.
Leave a Reply