Are you thinking about setting up your online store but not sure how to begin? Well, you’re at the right place because this tutorial is just what you need!
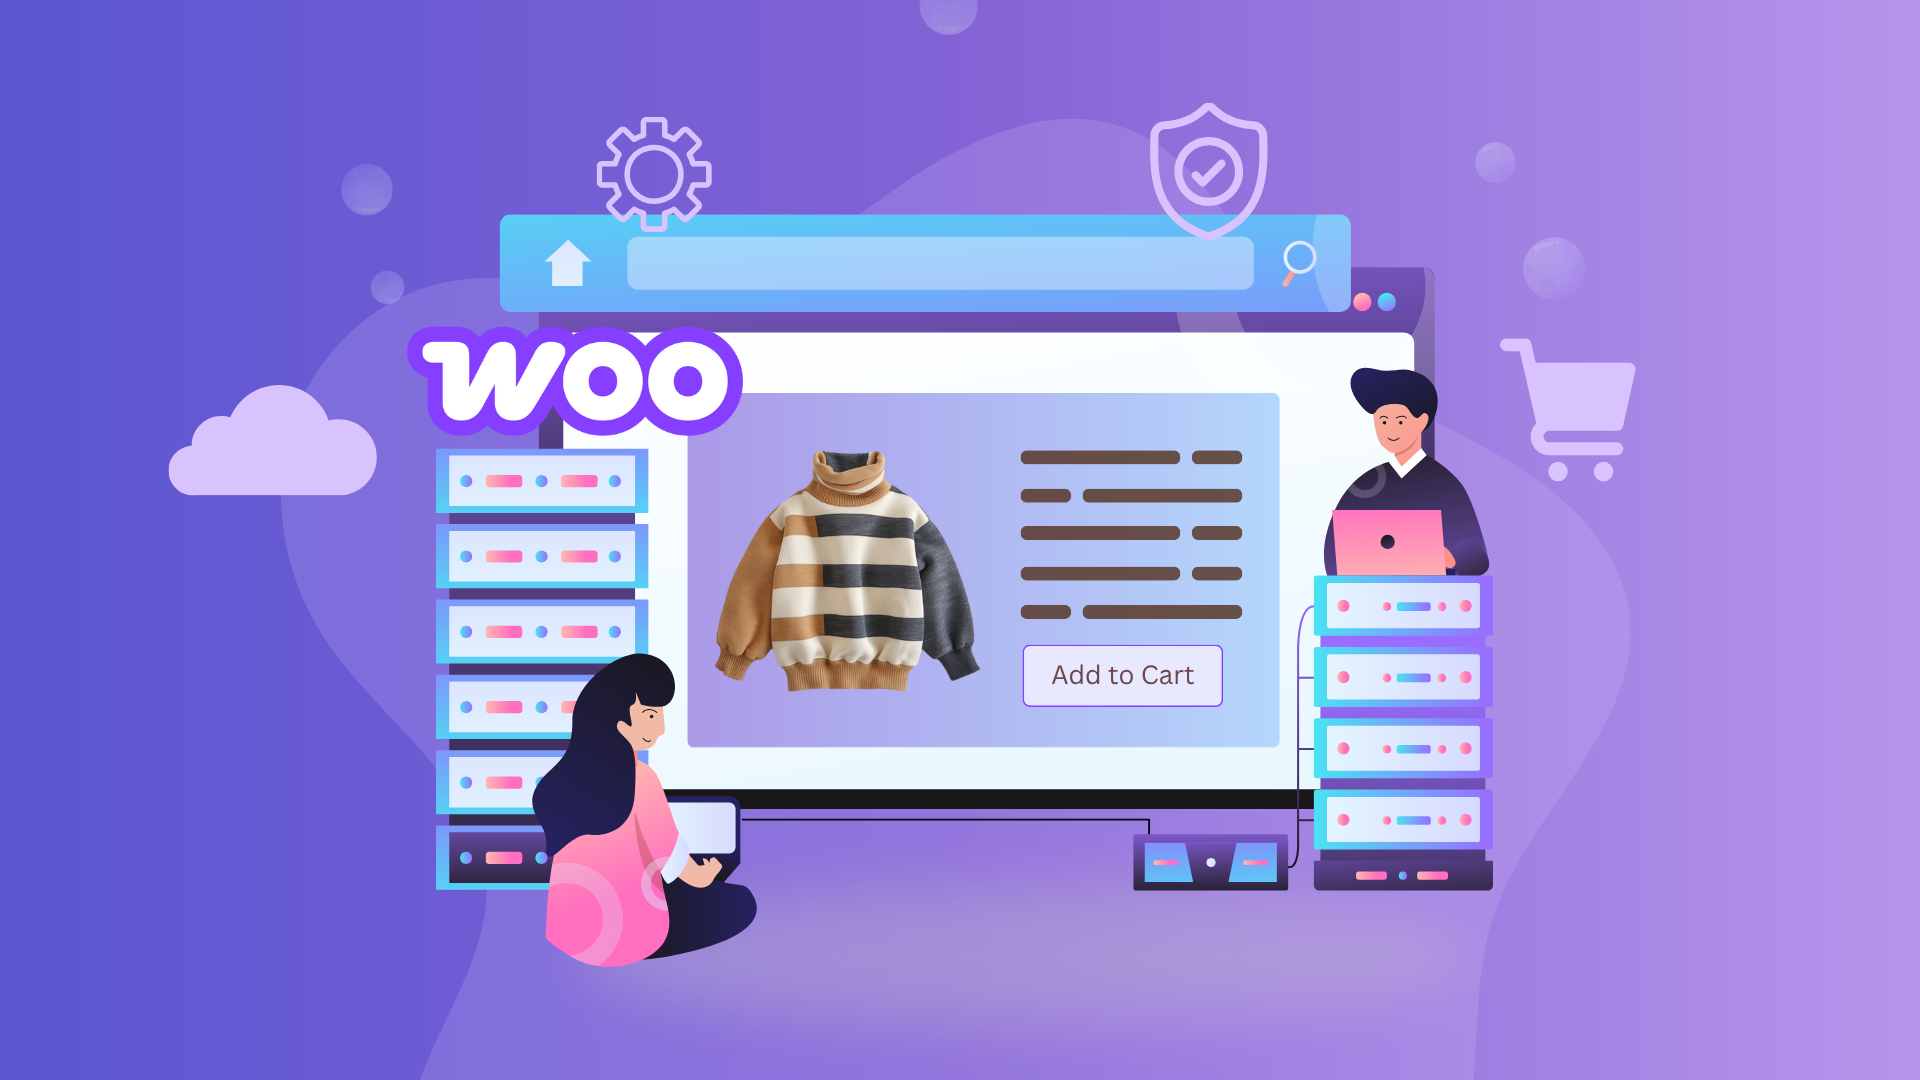
Many plugins are available to create an online store, but one of the best ways to do this is with WooCommerce. This plugin is great because it’s user-friendly and easy to manage.
Once you install WooCommerce, you might need help getting started, especially if you’re new to it. But no worries! Setting up WooCommerce at the beginning can feel overwhelming, but with the proper guidance, you’ll run your online shop in no time.
In this beginner-friendly guide, you’ll learn how to install, configure, and fully set up WooCommerce to start selling your products online with ease.
Key Takeaways
- Learn what WooCommerce is and why it’s perfect for beginners starting an online store.
- Discover how to install and activate WooCommerce with step-by-step visuals.
- Explore how to configure payments, tax settings, and product listings.
- Find out how to customize your store and launch it with confidence.
What is WooCommerce and Why Should You Use It?
WooCommerce is an open-source ecommerce platform for setting up online stores. Millions of enterprises and businesses around the world have used it. The best part of WooCommerce is that you don’t need coding knowledge to use it.
One of the cool things about WooCommerce is that you can set up your store easily. You can make shopping carts, product pages, and checkout pages without touching a single line of code.
Once your store is up and running, WooCommerce empowers you to keep everything in order. You can track how much stock you have left, take payments from customers, figure out shipping costs, and even deal with taxes. And if you need extra features, there are lots of add-ons you can use to customize your store even more, giving you full control over your online business.
Why Is WooCommerce a Great Choice for Online Stores?
- Free of Cost: WooCommerce doesn’t ask for any money from you. So, you can set up your online store without having to pay anything at all.
- Open Source: Since it is an open-source platform, you can edit its code and write your customized code.
- User-Friendly: It is super easy to use, and you don’t need to be a tech expert or developer to set up your online store. Its interface is designed to be simple so you can create your store yourself.
- Security: WooCommerce keeps your customers’ info safe and ensures all transactions between you and them are secure. Plus, it helps to protect your store from hackers.
- Support Plugins: WooCommerce has many plugins that make your store even better. You can add these plugins to your store to give it cool new features and make it work even smoother.
- Mobile-Friendly: Most people visit the e-commerce site through their mobile devices. With WooCommerce, your store will look great and work smoothly on all mobile devices.
What Are the Steps to Set Up Your WooCommerce Store?
Setting up WooCommerce is simple and easy to do. Let’s discuss the steps for configuring the WooCommerce setup.
Install & Activate WooCommerce Plugin
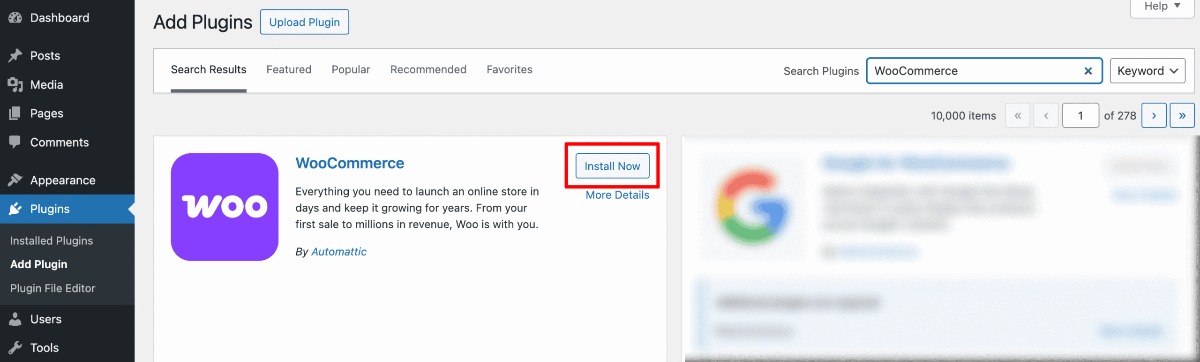
To set up WooCommerce, you first need to install the WooCommerce plugin. You can get it from the WordPress repository and upload it or install it by navigating to WordPress Dashboard ➝ Plugins ➝ Add New.
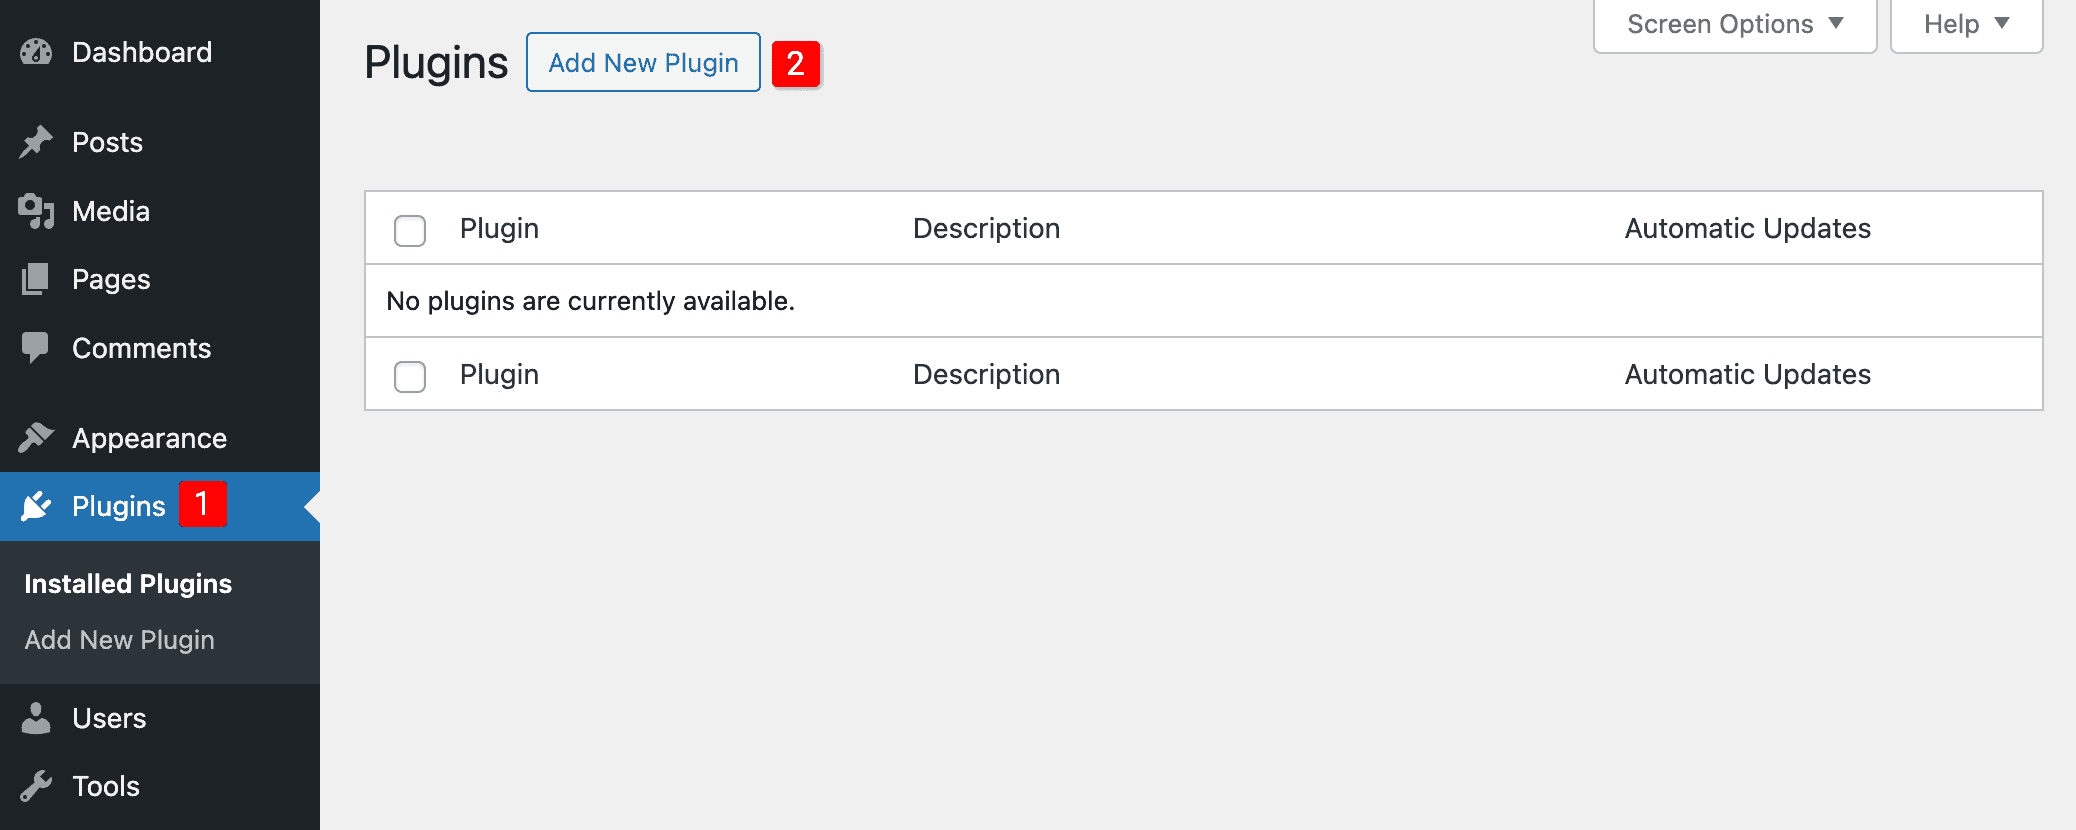
Look for WooCommerce in the search bar, and when you find it, click on the install button. Once it’s installed, make sure to activate it on your website.
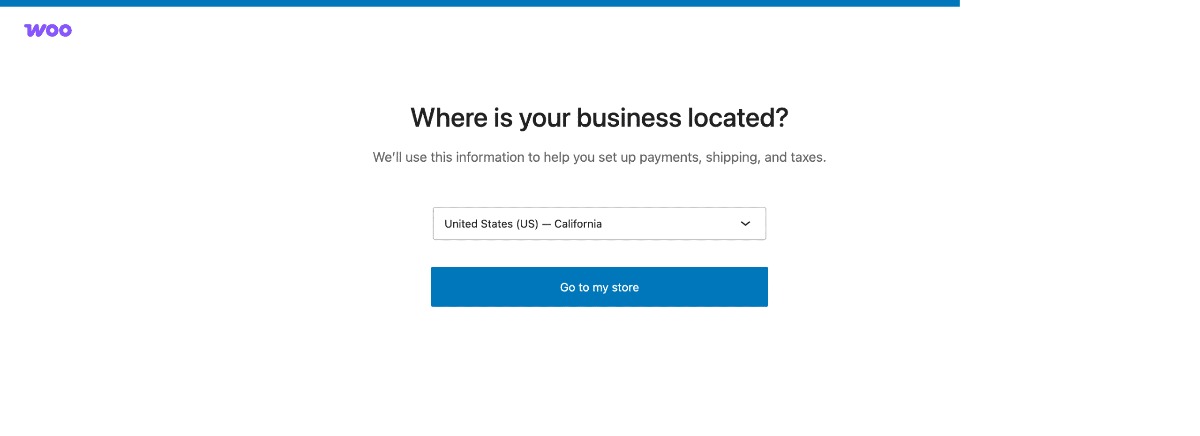
When you activate the plugin, WooCommerce will launch a setup guide page where you must answer some questions about your store. But if you want, you can skip this guide and go ahead and set up your store.
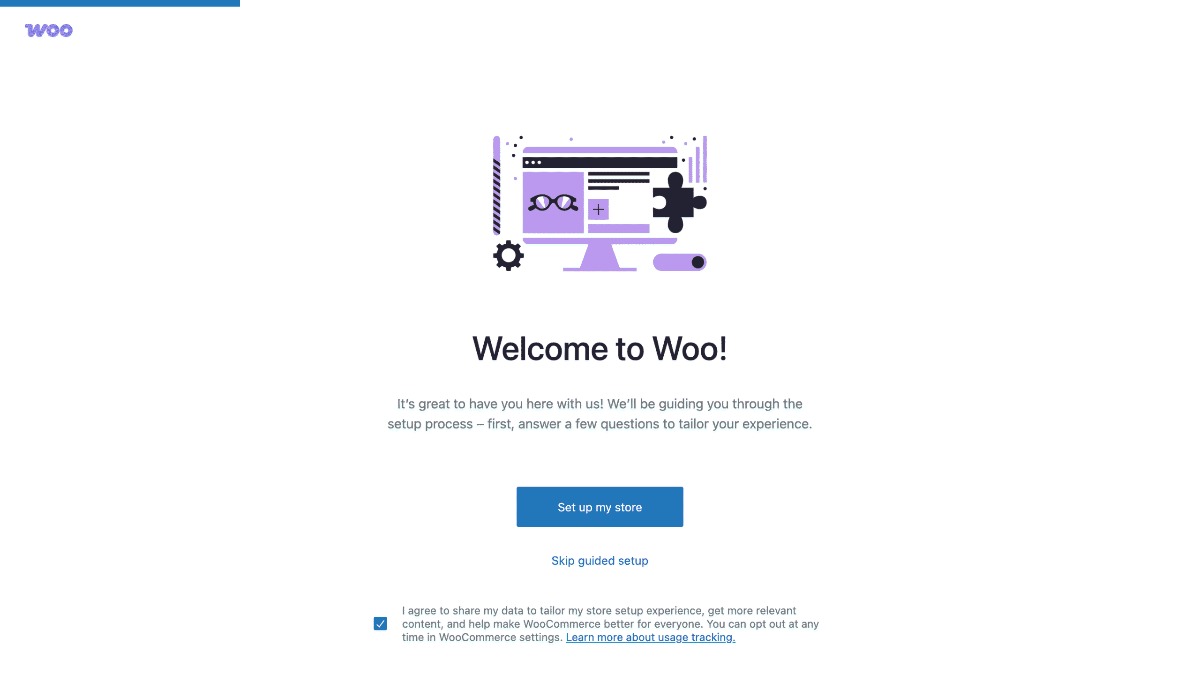
When you skip the setup, you’ll be asked to select where your business is located. Once you’ve chosen, click on the “Go to My Store” button.
Configure Your Store
Then, it will guide you through a setup wizard that will show you the steps to set up WooCommerce by showing you a series of processes from which you can choose. It’s like having a helpful guide to define the setup process step by step.
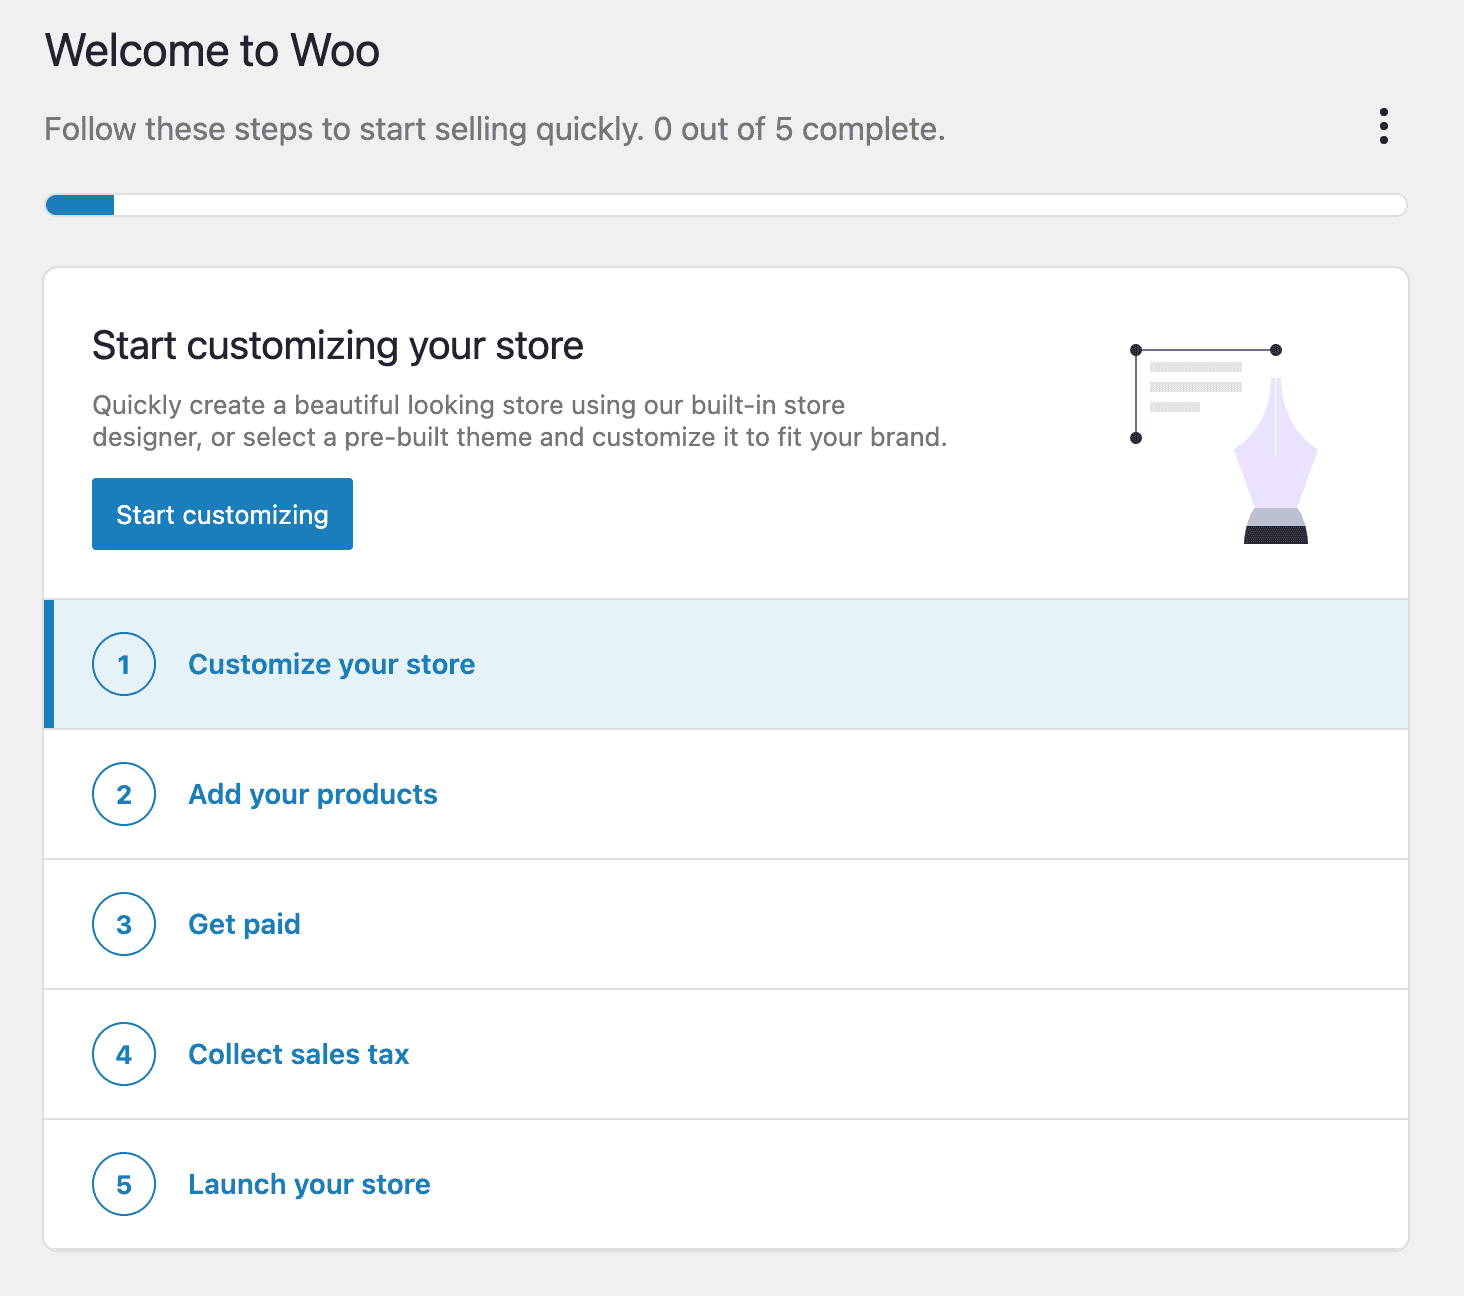
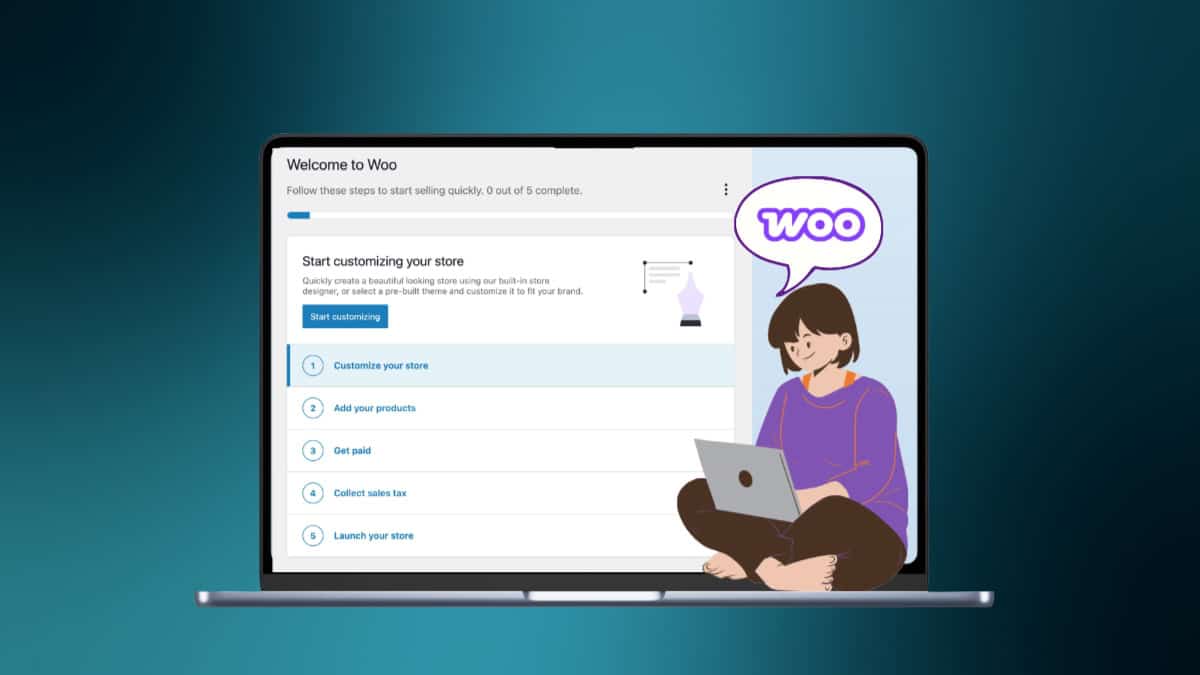
Customize Your Store
When you choose to customize your store, you’ll be taken to a page where you can change how your store looks. You can either design it yourself or buy & download a theme and customize it to fit your needs.

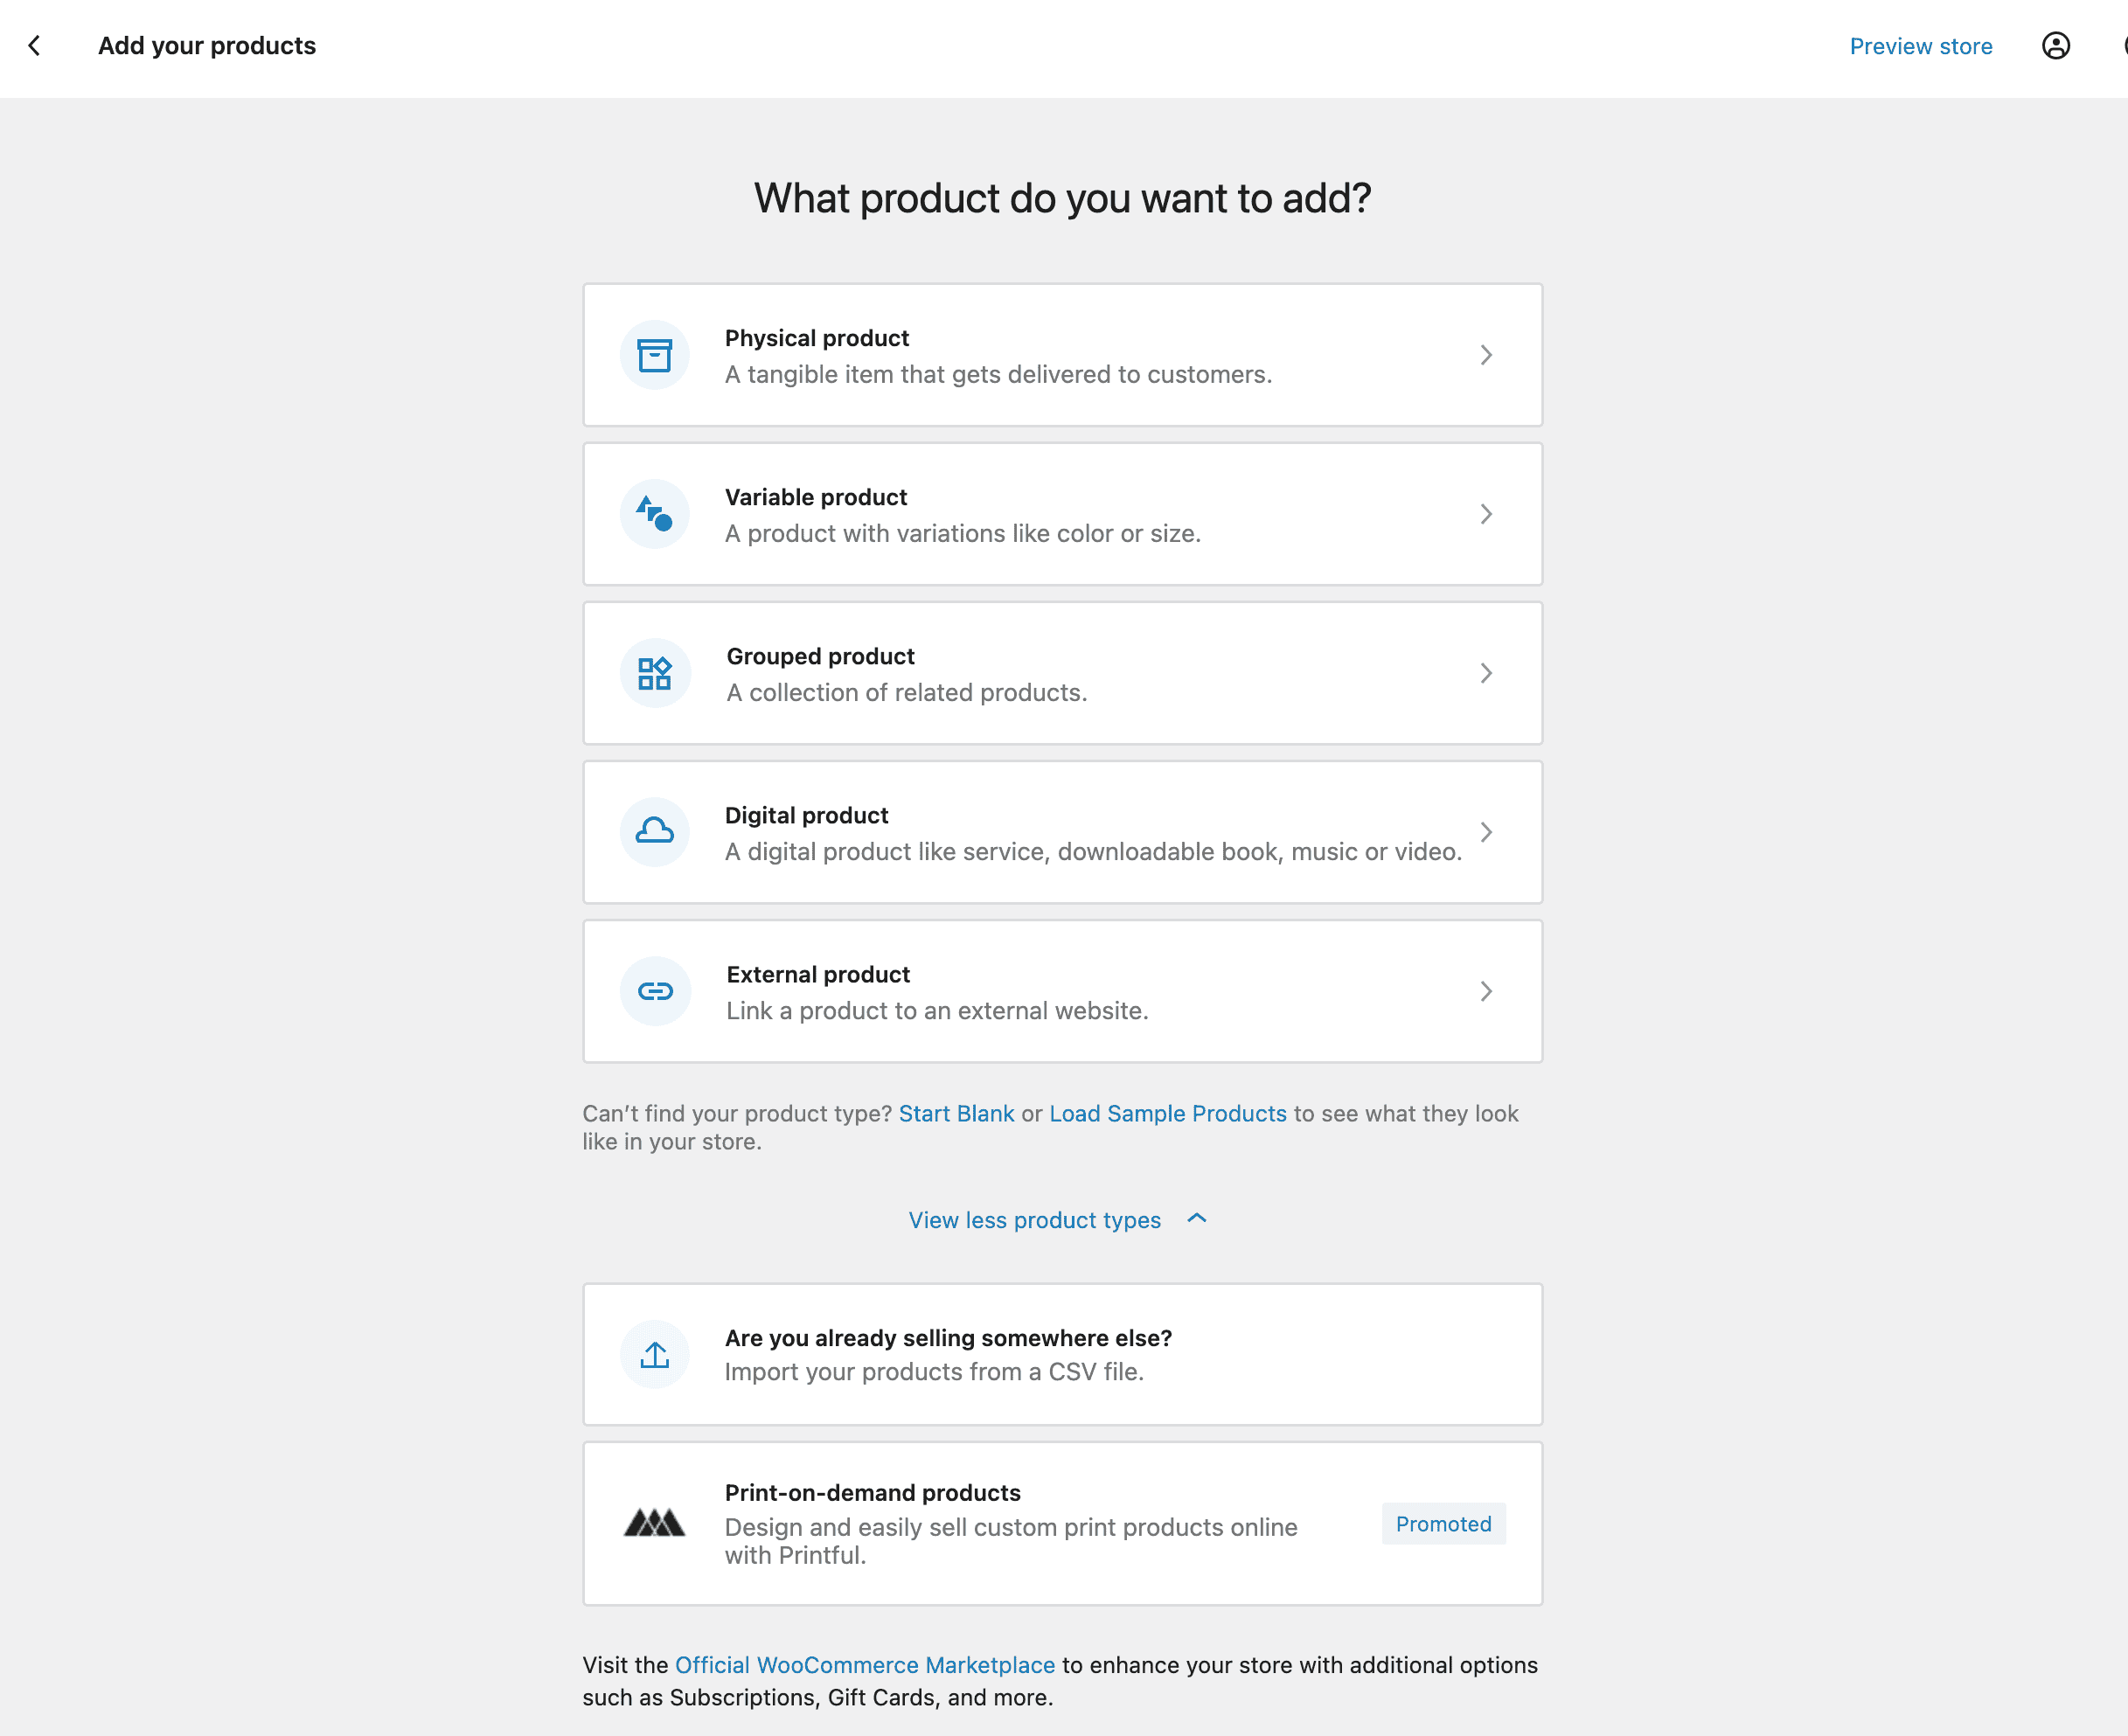
Add Products to Your Store
Once you’ve finished the first task, the next step is to add WooCommerce products to your store. When you click on the “Add Product” option, you’ll be prompted to start adding products. You can add different kinds of products, like variable, digital products, or others.
If you have many products to add, you can also import them all at once by clicking on “Import Your Products from a CSV File” instead of adding them individually.
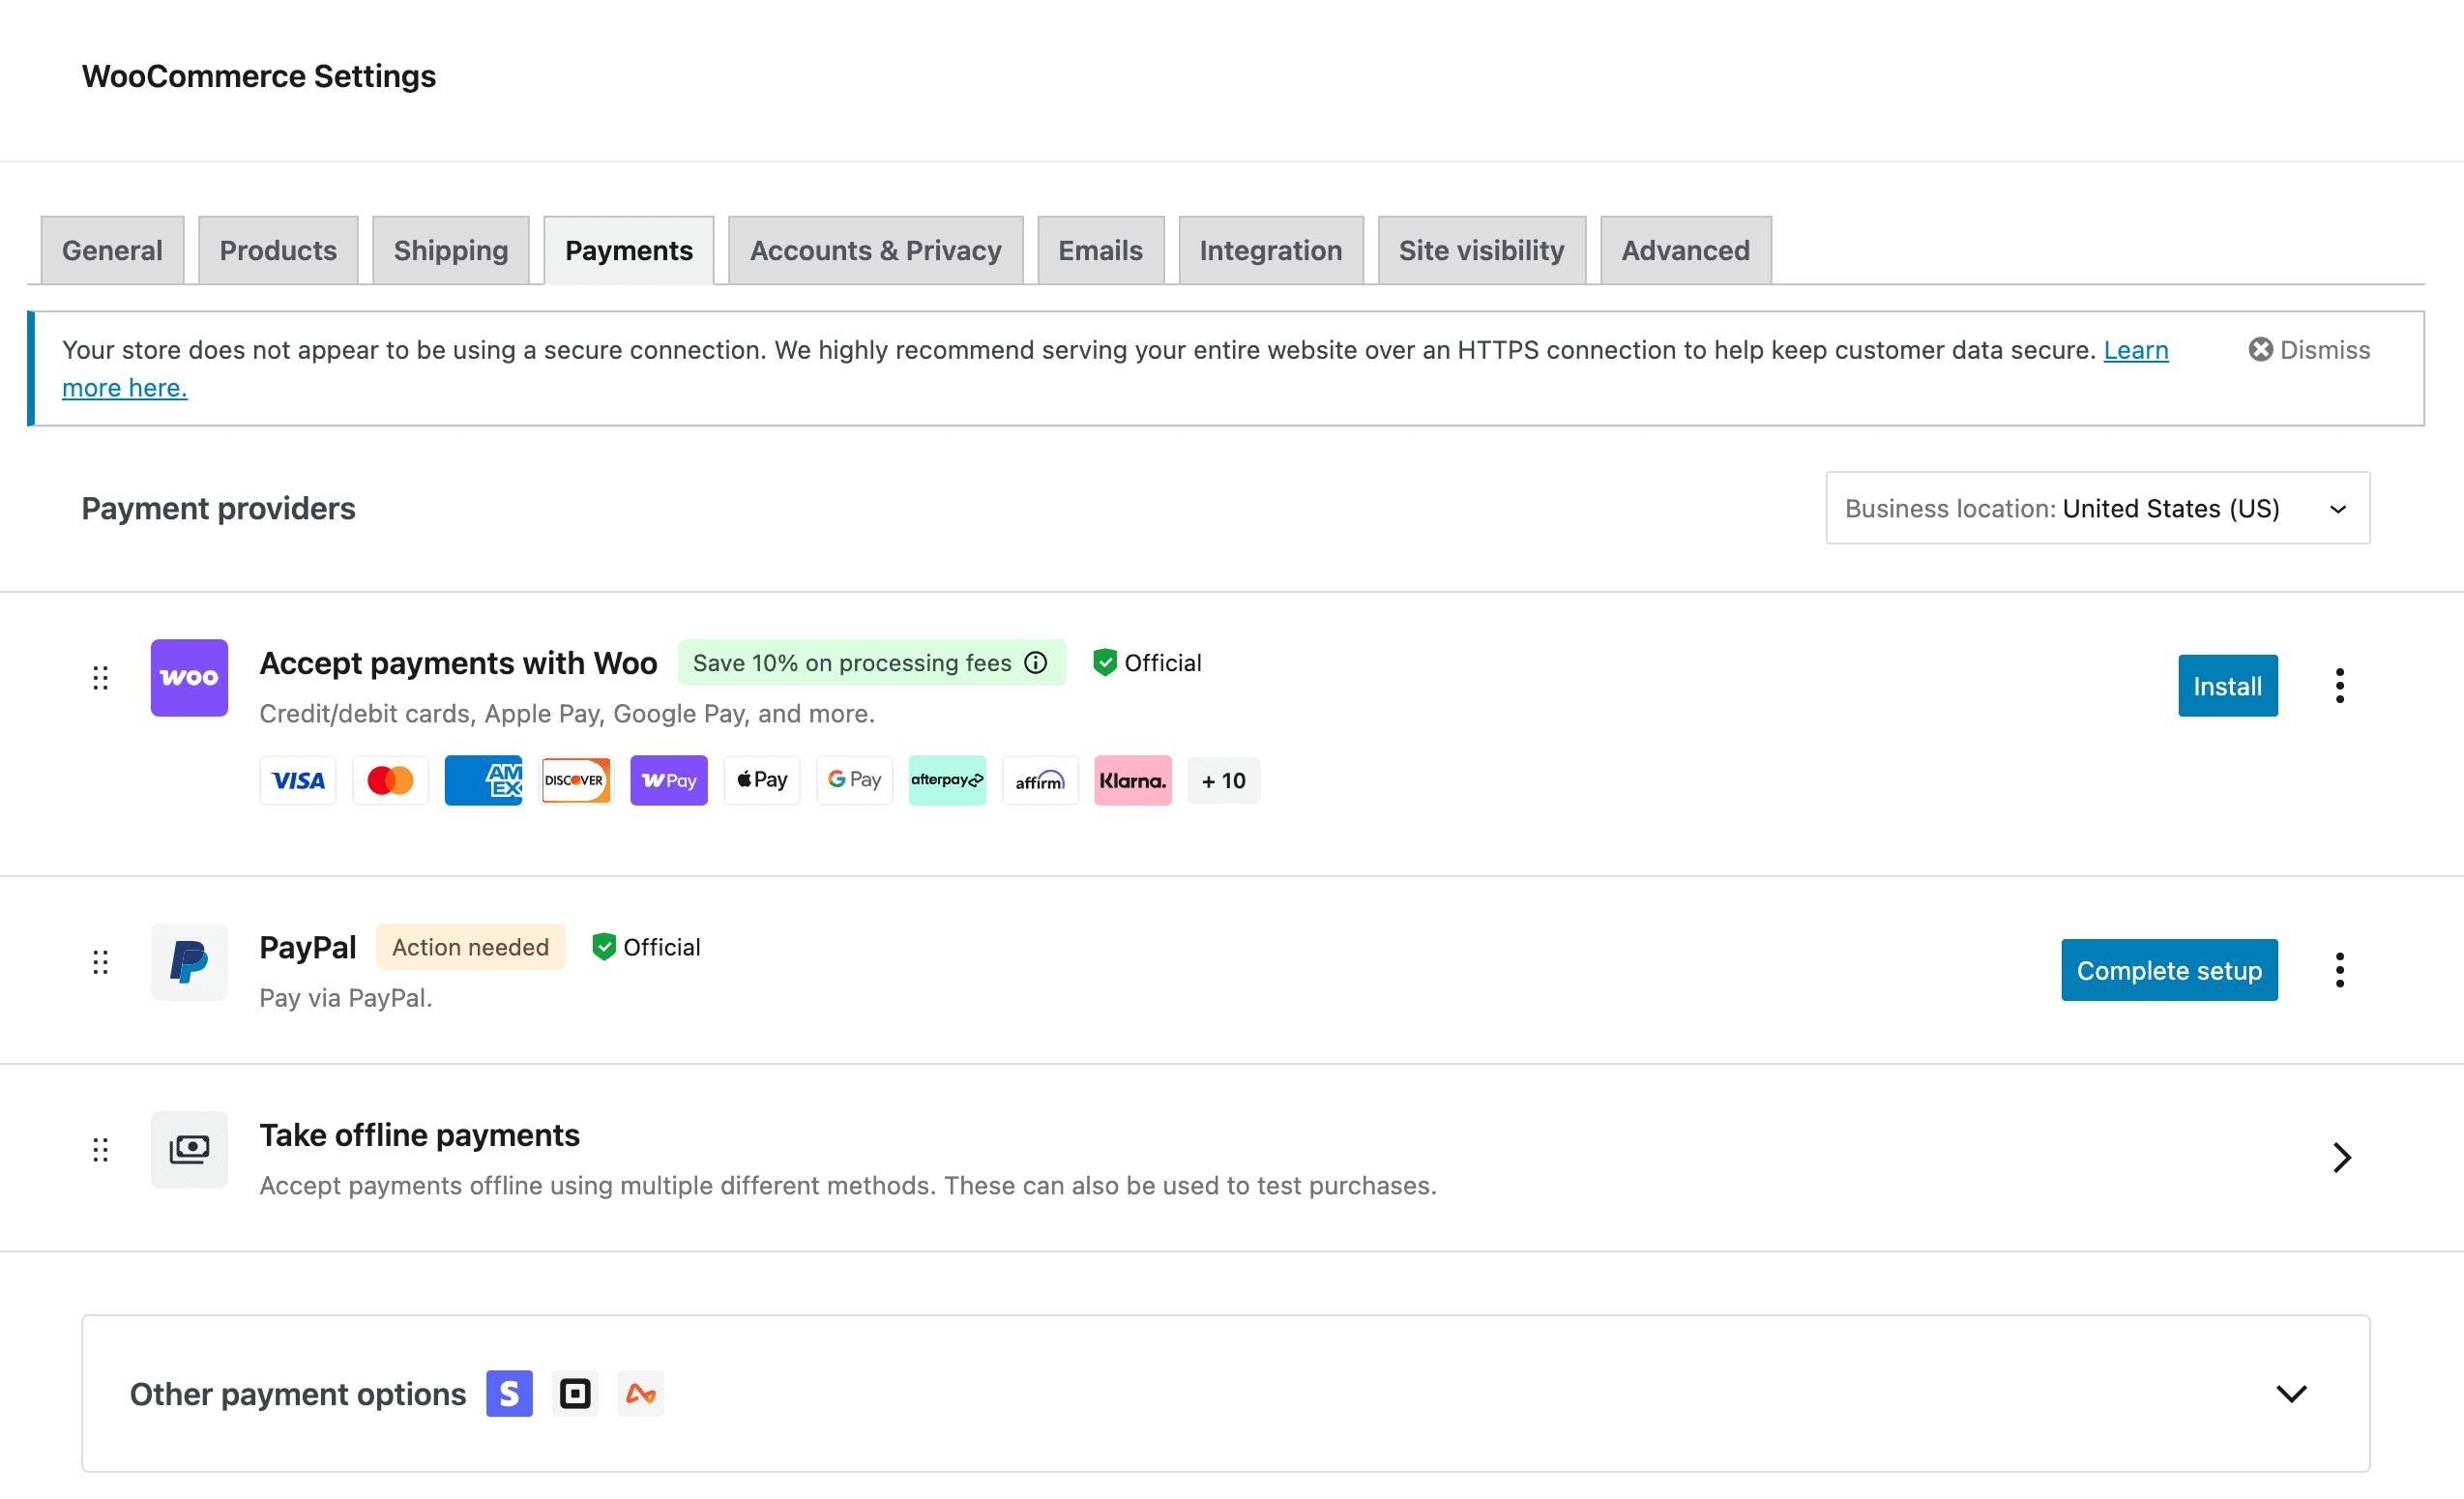
Select Your Payment Method
In the next step, you have to select the payment method in which you can select the WooPayments plugin, which can include some payment options by default, like Gpay, Apple Pay, Master Card, and more.
You can also select additional plugins to add payment methods to your WooCommerce store, including offline payment methods in WooCommerce.
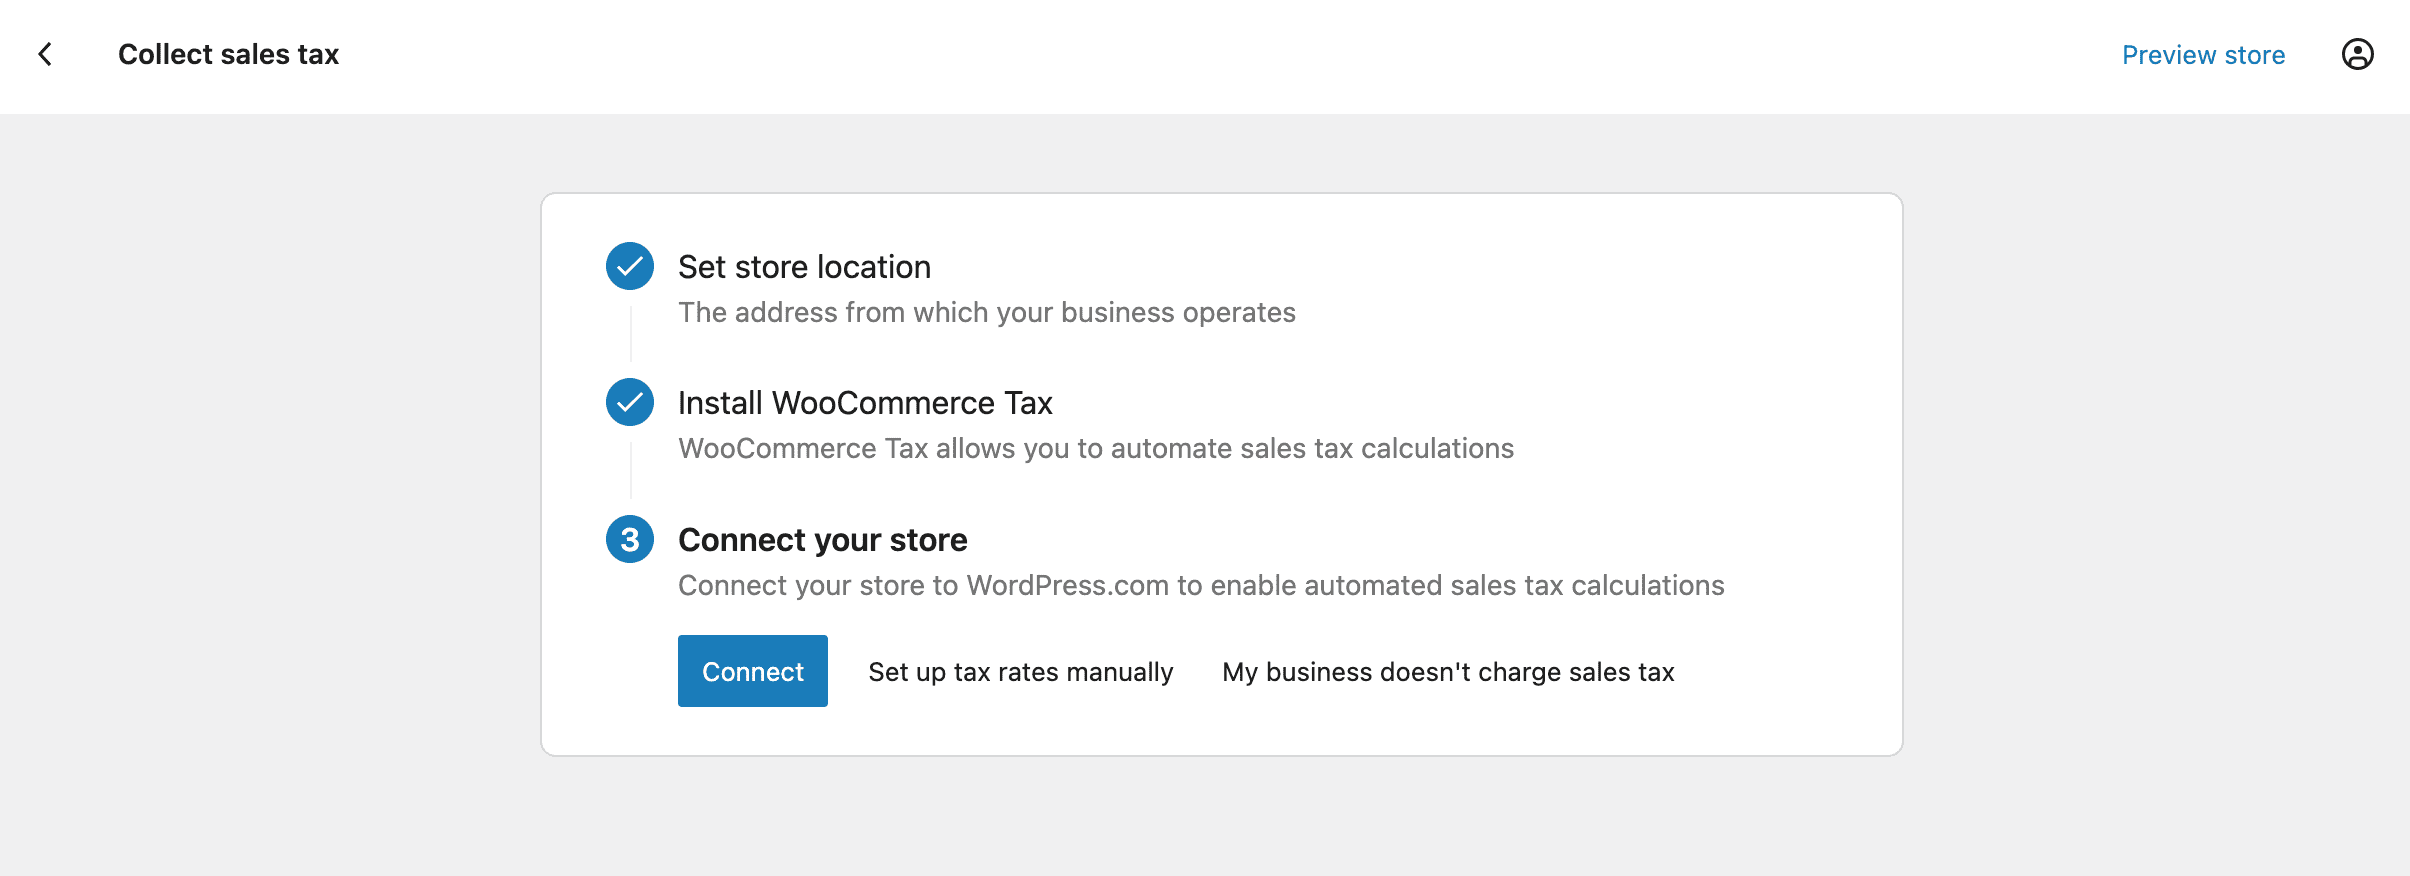
Set Up Your Sales Tax
In the sales Tax section, you must decide whether you allow tax charges. If you want to set up taxes manually for all the places you sell, click the “Setup Tax Manually” option.

But if you decide to keep going with the setup, WooCommerce might ask where your business is located. Then, it suggests installing a WooCommerce Tax plugin and connecting with the store. This plugin helps automatically figure out how much sales tax to charge.
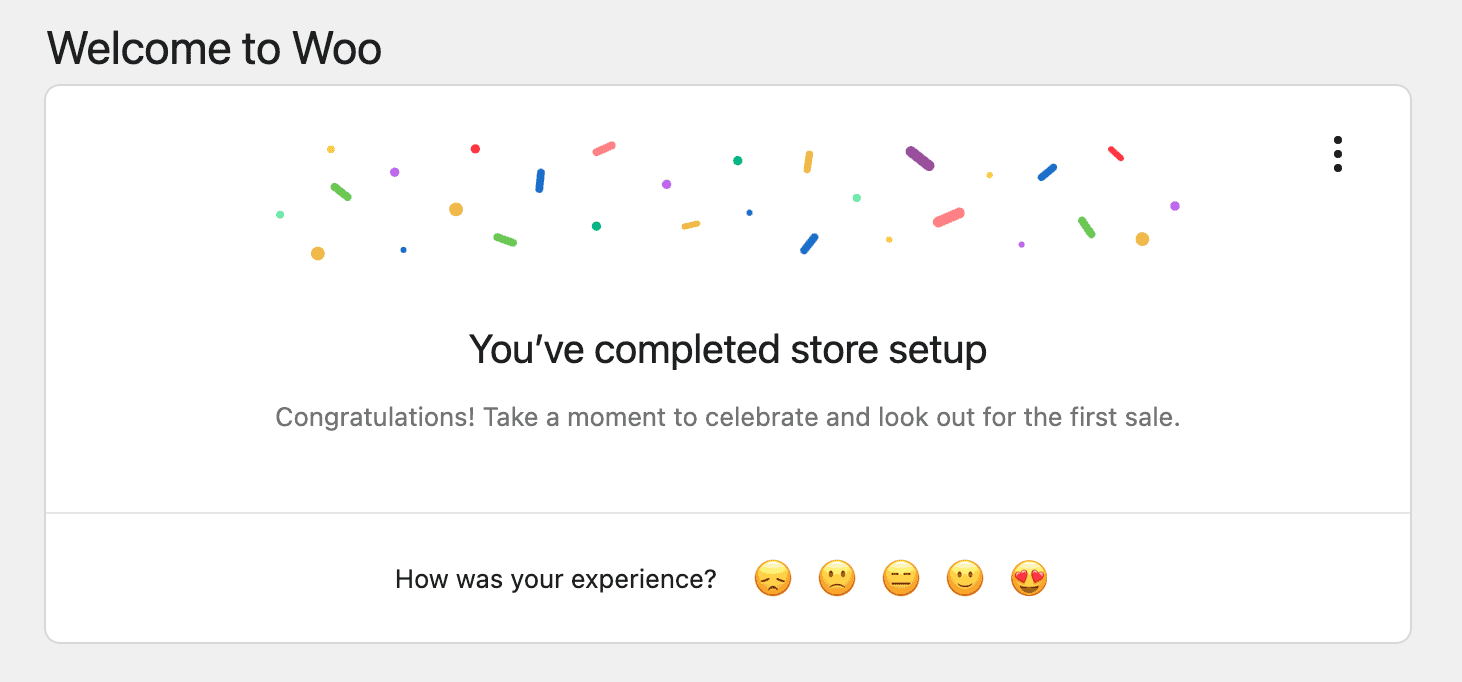
And that’s it, you’re all set up with WooCommerce! It’s done everything it needed to do, and you’re good to go. If you ever want to edit or adjust anything in WooCommerce, you can do it yourself by going into the WooCommerce Settings.
Set Up Your WooCommerce Store
Setting up WooCommerce for your online store is not too hard. This step-by-step guide makes it easy to create and efficiently set up your online store. With clear instructions, you can confidently navigate the process, ensuring a smooth and successful establishment of your WooCommerce store. It comes with lots of features to help you sell products, take payments, and handle deliveries. Overall, it gives you everything you need to run a successful online store.
FAQs on Setting Up a WooCommerce Store
Is WooCommerce free to use?
Yes, WooCommerce is completely free and open-source. You can build and run your online store without paying for the core plugin.
How do I install WooCommerce on my WordPress site?
Go to your WordPress dashboard ➝ Plugins ➝ Add New, search for “WooCommerce,” then install and activate it to begin the setup wizard.
What payment gateways does WooCommerce support?
WooCommerce supports PayPal, Stripe, WooPayments, Apple Pay, and other gateways. You can also enable offline payments like COD, check payment, and more.
How do I import and export WooCommerce products?
WooCommerce makes it easy to import and export products using CSV files. Just go to Products → All Products in your WordPress dashboard, and you’ll see the “Import” and “Export” buttons at the top.
Does WooCommerce support shipping setup?
You can set up shipping zones, flat rates, and shipping classes by going to WooCommerce → Settings → Shipping in your dashboard.
Want to learn more? Check out our complete guide on WooCommerce Shipping.
Does WooCommerce support coupons and discounts?
Yes, you can create percentage or fixed coupons from the Marketing → Coupons section in the WooCommerce dashboard.
Leave a Reply