This guide explains the main settings available in Content Lifecycle Manager.
Open the Settings Screen
Go to:
Content Lifecycle > Settings
The settings screen is divided into three tabs: General, Notifications, and Help & Resources.
A Settings link also appears under the plugin name on the Plugins screen, providing a quick shortcut directly to the General tab.
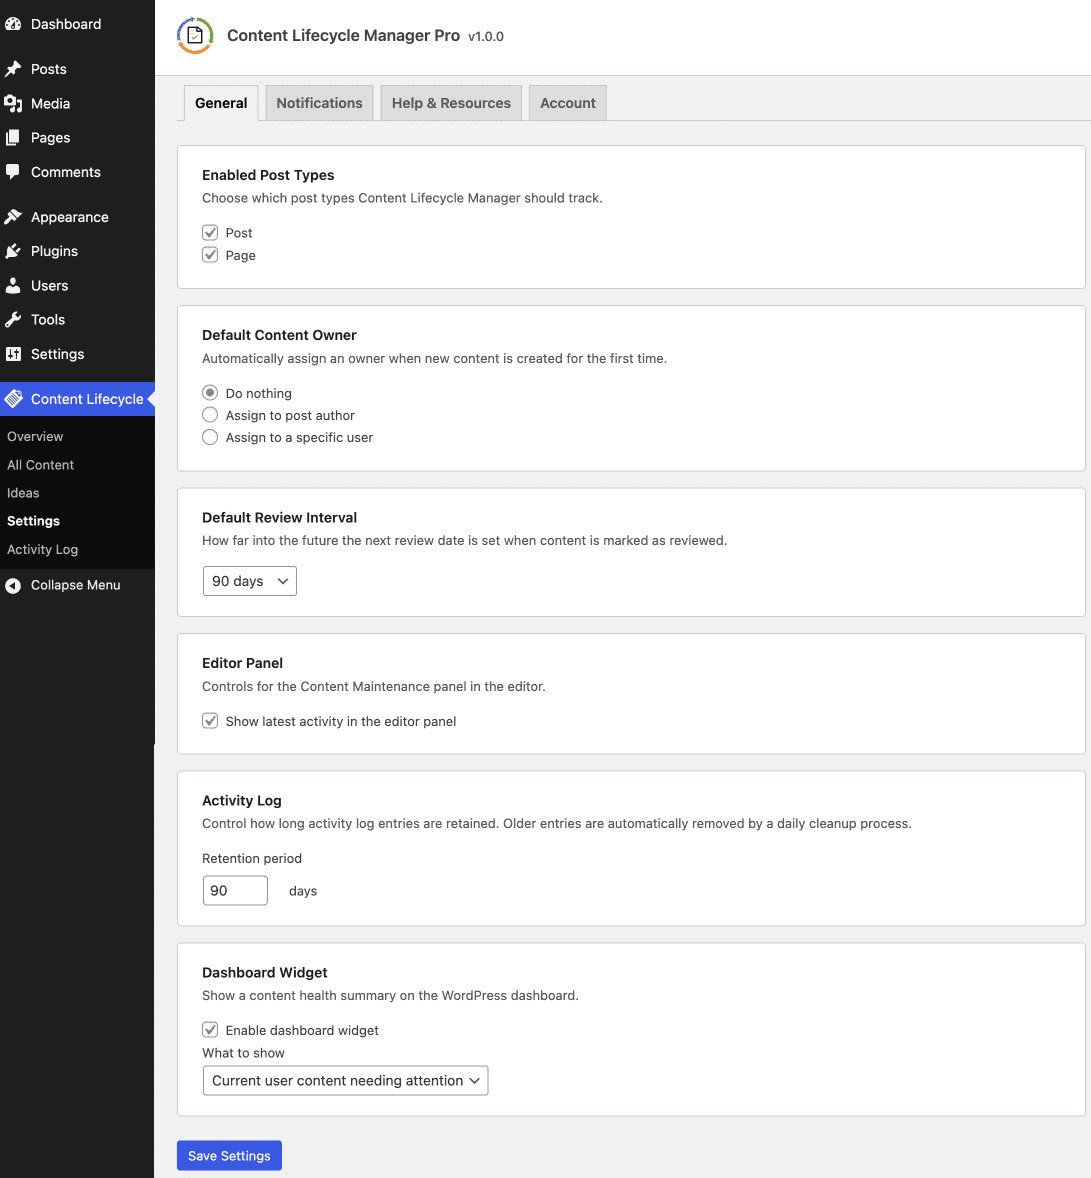
General Tab
Enabled Post Types
Choose which post types the plugin should manage.
Only enabled post types will:
- appear in the plugin’s content screens
- show the Content Maintenance panel in the block editor and classic editor
- participate in the lifecycle workflow
Default Content Owner
Controls whether an owner is automatically assigned when new content is created for the first time.
Options:
- Do nothing – no owner is assigned automatically (default)
- Assign to post author – the WordPress user who created the post is set as owner on first save
- Assign to a specific user – a chosen user (from a dropdown limited to Editors and Administrators) is assigned as owner on first save
The assignment only happens on the very first real save of a post. If an owner was already set explicitly (for example via the editor panel before saving), the default is not applied.
Default Review Interval
Controls how far into the future the next review date is set when content is marked as reviewed.
You can:
- choose a preset value (90, 180, or 365 days)
- choose
Customand enter your own number of days
Editor Panel
Show latest activity in the block editor panel — when enabled, the Content Maintenance panel in the block editor displays the most recent activity log entry for the post. Requires the Activity Log to be enabled (Pro).
Activity Log
Pro feature. Controls how long activity log entries are kept before being automatically removed.
Settings:
- Retention period – the number of days to retain log entries (default: 90). Entries older than this are deleted by a daily background task.
Developers can override the retention period in code using the clmngr_activity_log_retention_days filter, regardless of the value saved in settings.
Dashboard Widget
Pro feature. Show a content health summary on the WordPress dashboard.
Options:
- Enable dashboard widget – turns the widget on or off
- What to show – choose between content assigned to the current user or all content needing attention
Notifications Tab
All notification settings require Content Lifecycle Manager Pro.
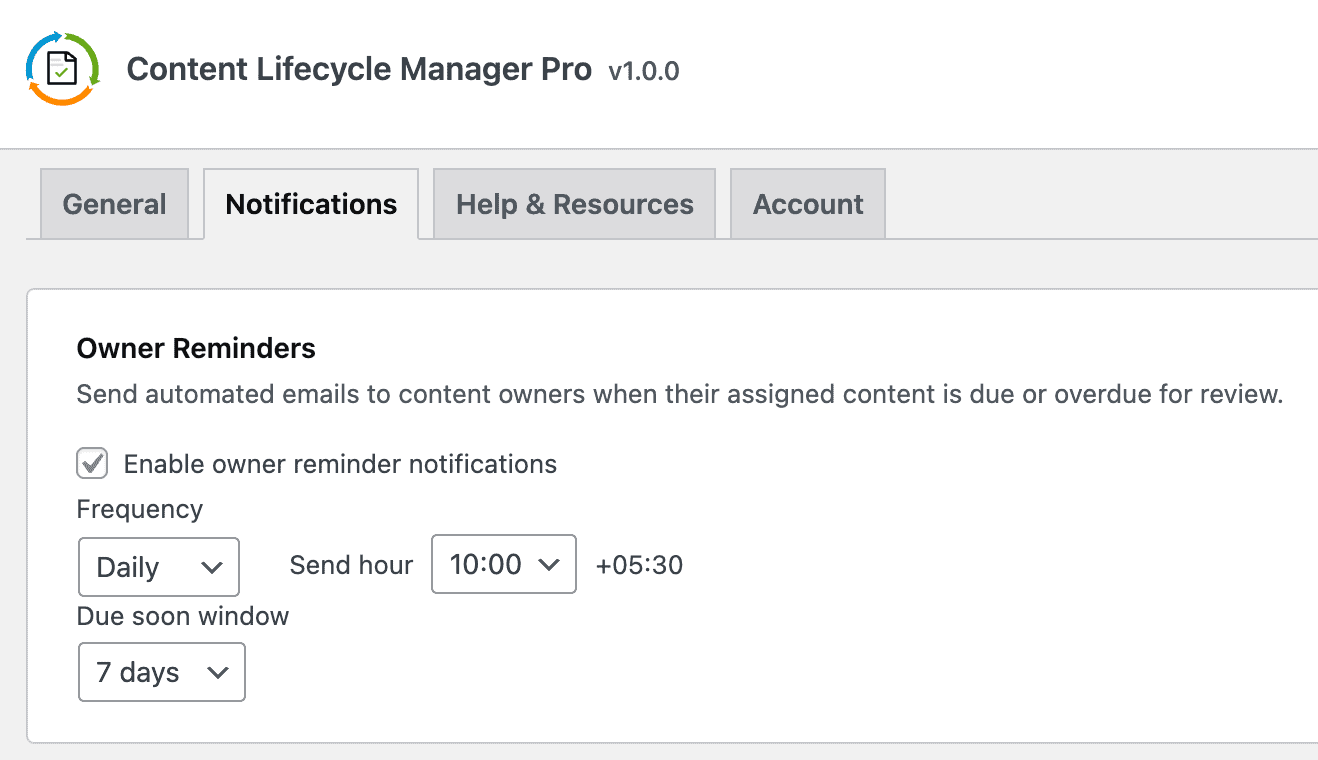
Owner Reminders
Sends automated emails to content owners when their assigned content is due or overdue for review.
Settings:
- Enable owner reminder notifications – turns reminders on or off; related controls are hidden when disabled
- Frequency – daily or weekly
- Send hour – the hour of day to send (in site timezone)
- Weekday – day of week to send (when frequency is weekly)
- Due soon window – how far ahead to consider content “due soon” (3, 7, 14 days, or custom)
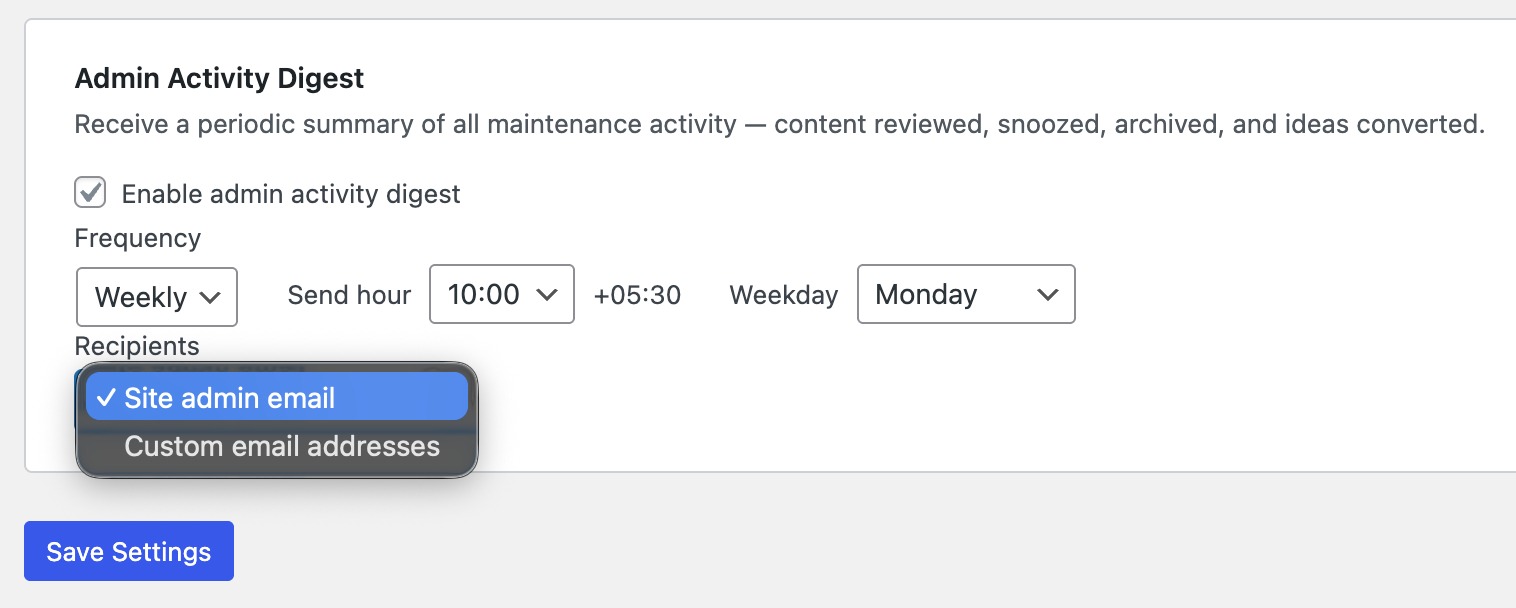
Admin Activity Digest
Sends a periodic summary of all maintenance activity to the site admin or a custom email address.
Includes: content reviewed, review snoozed, content archived, content unarchived, and ideas converted.
Settings:
- Enable admin activity digest – turns the digest on or off; related controls are hidden when disabled
- Frequency – daily or weekly
- Send hour – the hour of day to send (in site timezone)
- Weekday – day of week to send (when frequency is weekly)
- Recipients – send to the site admin email, or enter one or more custom email addresses
No email is sent for periods with no activity.
Help & Resources Tab
Links to documentation, getting started guides, feature references, and support.
Existing Content Setup
If your site already contains older posts or pages, use the setup flow to bring them into the plugin.
The setup section appears at the bottom of the General tab.
For the full process, see: